
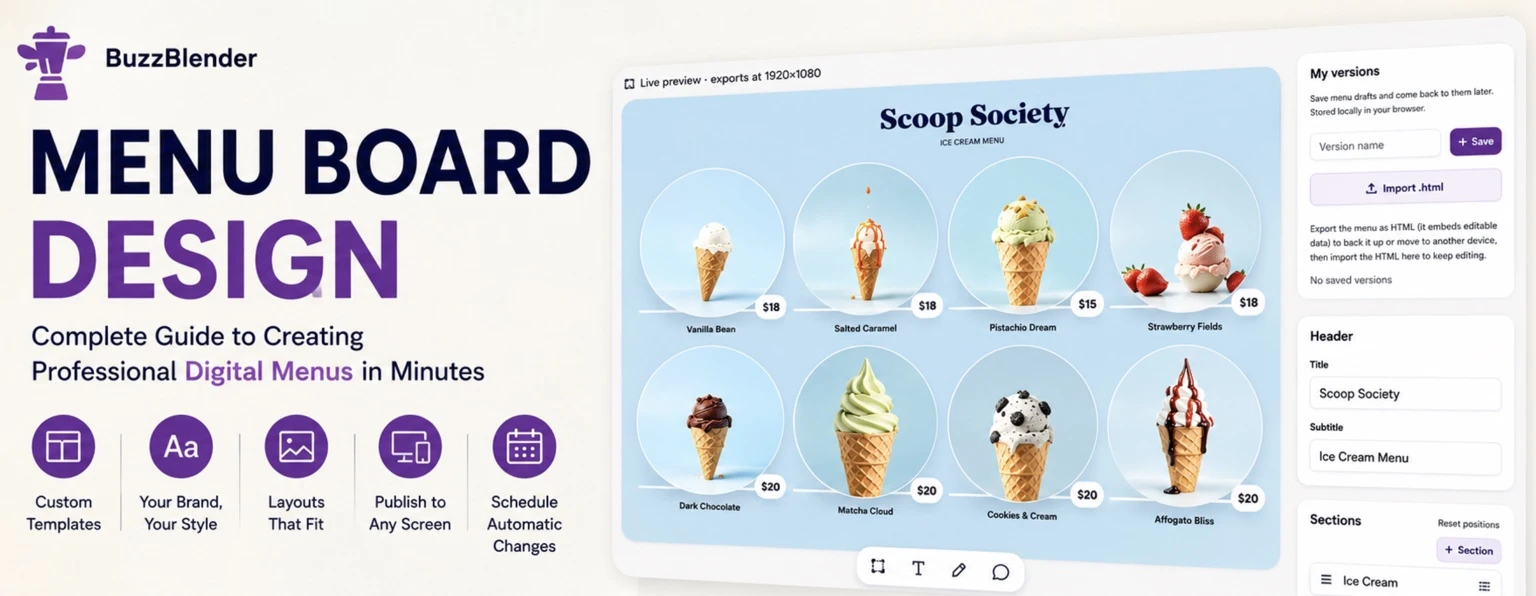
Creating a professional digital menu doesn’t require design experience. With the BuzzBlender Menu Board Editor, you can start with a ready-made template, customize it to match your brand, and publish it to your screens in just a few steps.
Whether you’re designing a menu for a coffee shop, restaurant, bakery or food truck, the process is exactly the same. See all free apps for Digital Signage.
Step 1. Open the Menu Board Editor
Start by opening the Menu Board Editor and choosing a template that matches your business.
Each template is fully customizable, so don’t worry if the colors, fonts or layout aren’t exactly what you’re looking for. Everything can be changed later.
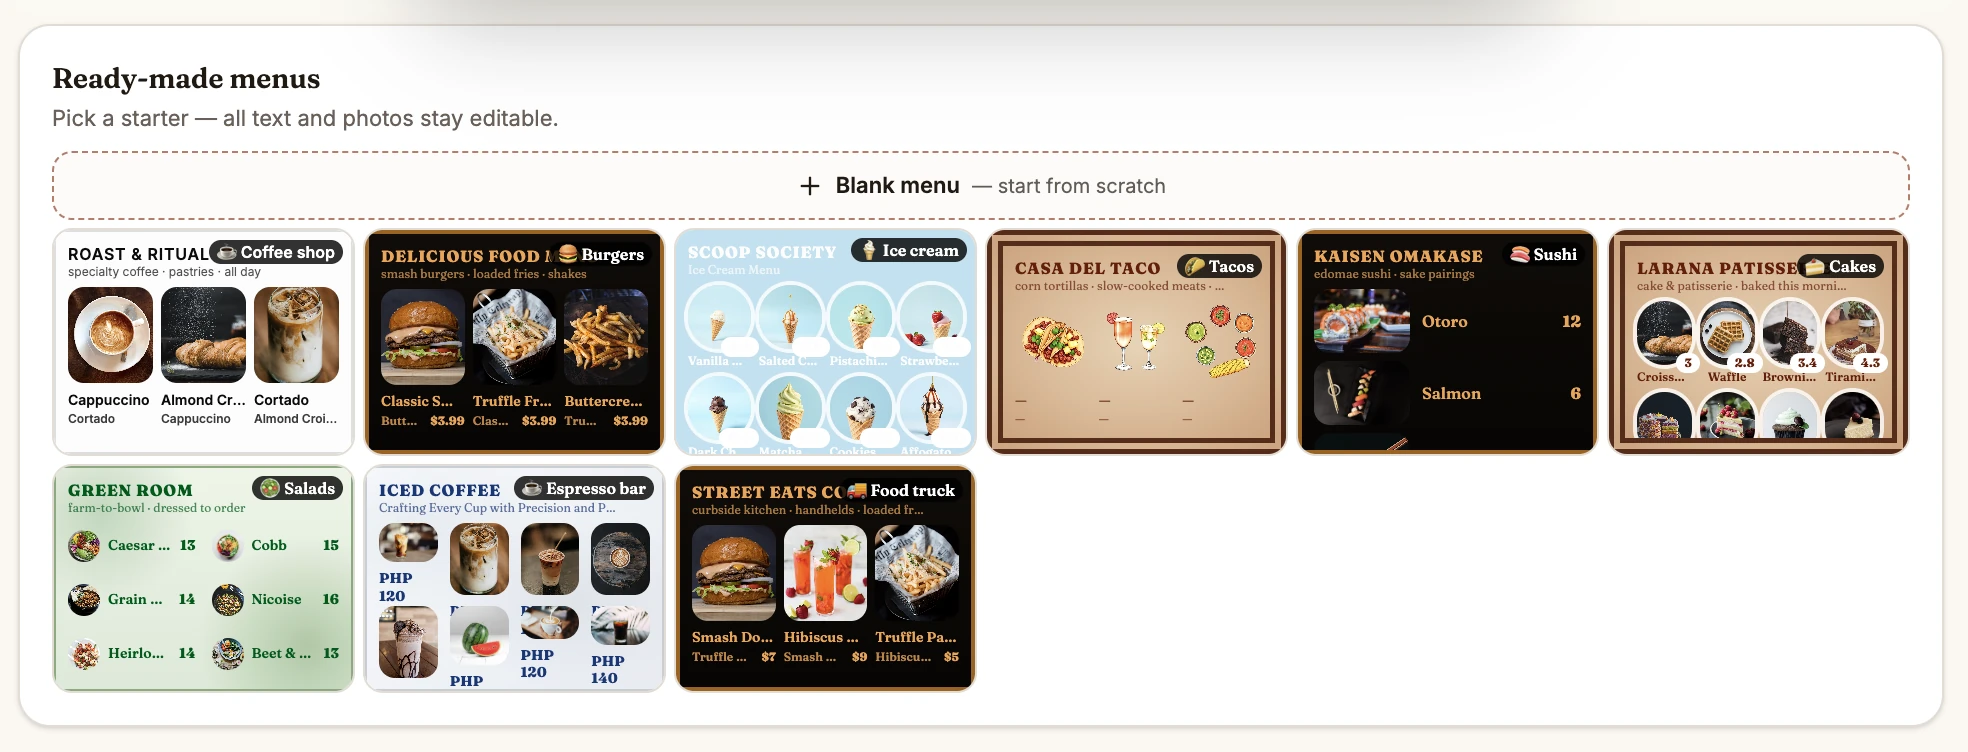
Later upload your own data to replace the sample content shown in the template. Perfect for coffee shop digital menu or any cafe menu board design.
Or start with a blank canvas by clicking the Blank Menu button. ✅
Step 2. Add Your Content
The quickest way to make the template your own is to add your branding.
Every template includes placeholder products and prices.
Update product names, descriptions and prices, then remove any sections you don’t need.
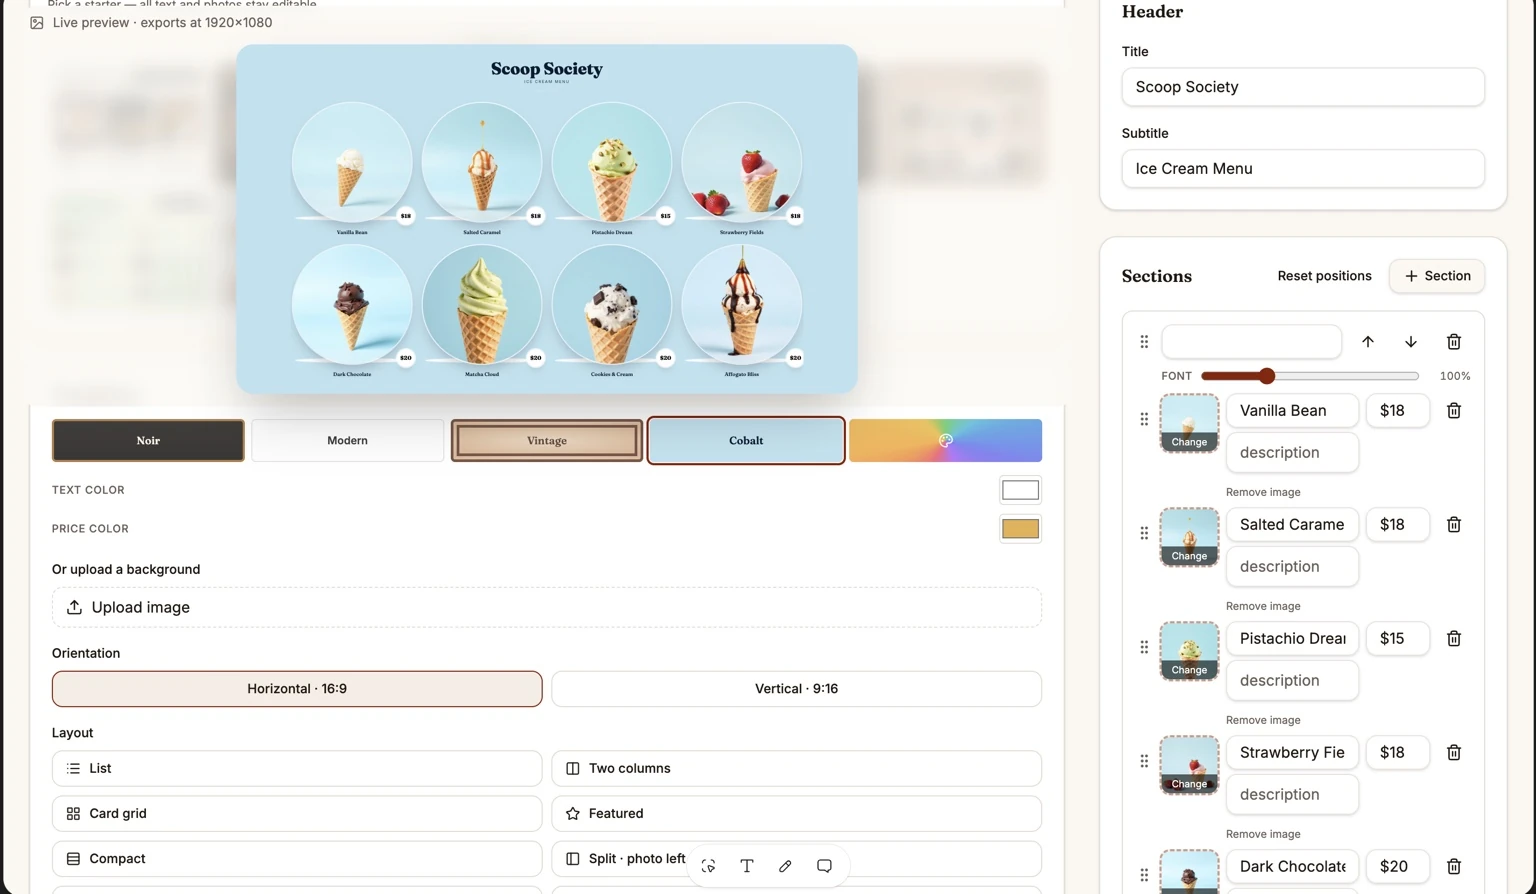
- Upload your product images using the right-hand panel Sections.
- Edit the title and set your prices to match your menu.
- Customize the background by choosing a solid color or uploading your own image using the panel below the preview.
- Change the screen orientation between horizontal (landscape) and vertical (portrait).
- Choose a different layout to find the design that best fits your menu and branding. From cafe to food truck menu board.
Step 3. Play with Layout
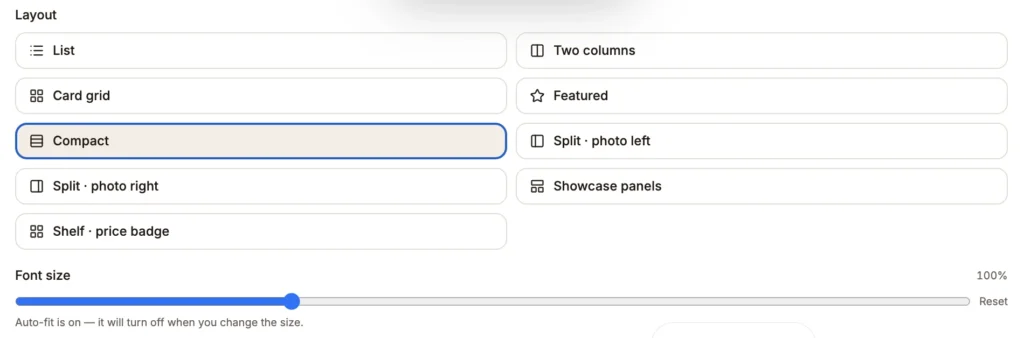
There are different options:
| List | A clean, classic menu with items displayed in a single vertical list. Perfect for readability and larger menus. |
| Two columns | Display more items at once with a balanced two-column layout. Ideal for menus with many categories or limited screen space. |
| Card grid | Showcase each menu item as an individual card with room for images and descriptions. Great for visual menus and featured products. |
| Featured | Highlight your signature items with larger images and bold presentation while keeping the rest of the menu easy to browse. |
| Compact | Fit the maximum number of items on screen with a space-efficient layout. Best for extensive menus or price lists. |
| Split · photo left | Pair your menu with a large image on the left and menu content on the right. Great for branding, promotions, or seasonal menus. |
| Split · photo right | Display a striking image on the right with your menu on the left. A polished layout that keeps your food front and center. |
| Showcase panels | Organize menu sections into bold visual panels that make categories easy to scan. Perfect for digital displays and promotions. |
| Shelf · price badge | Present items with eye-catching price badges that make pricing easy to spot. Great for cafés, bakeries, and retail-style menus. |
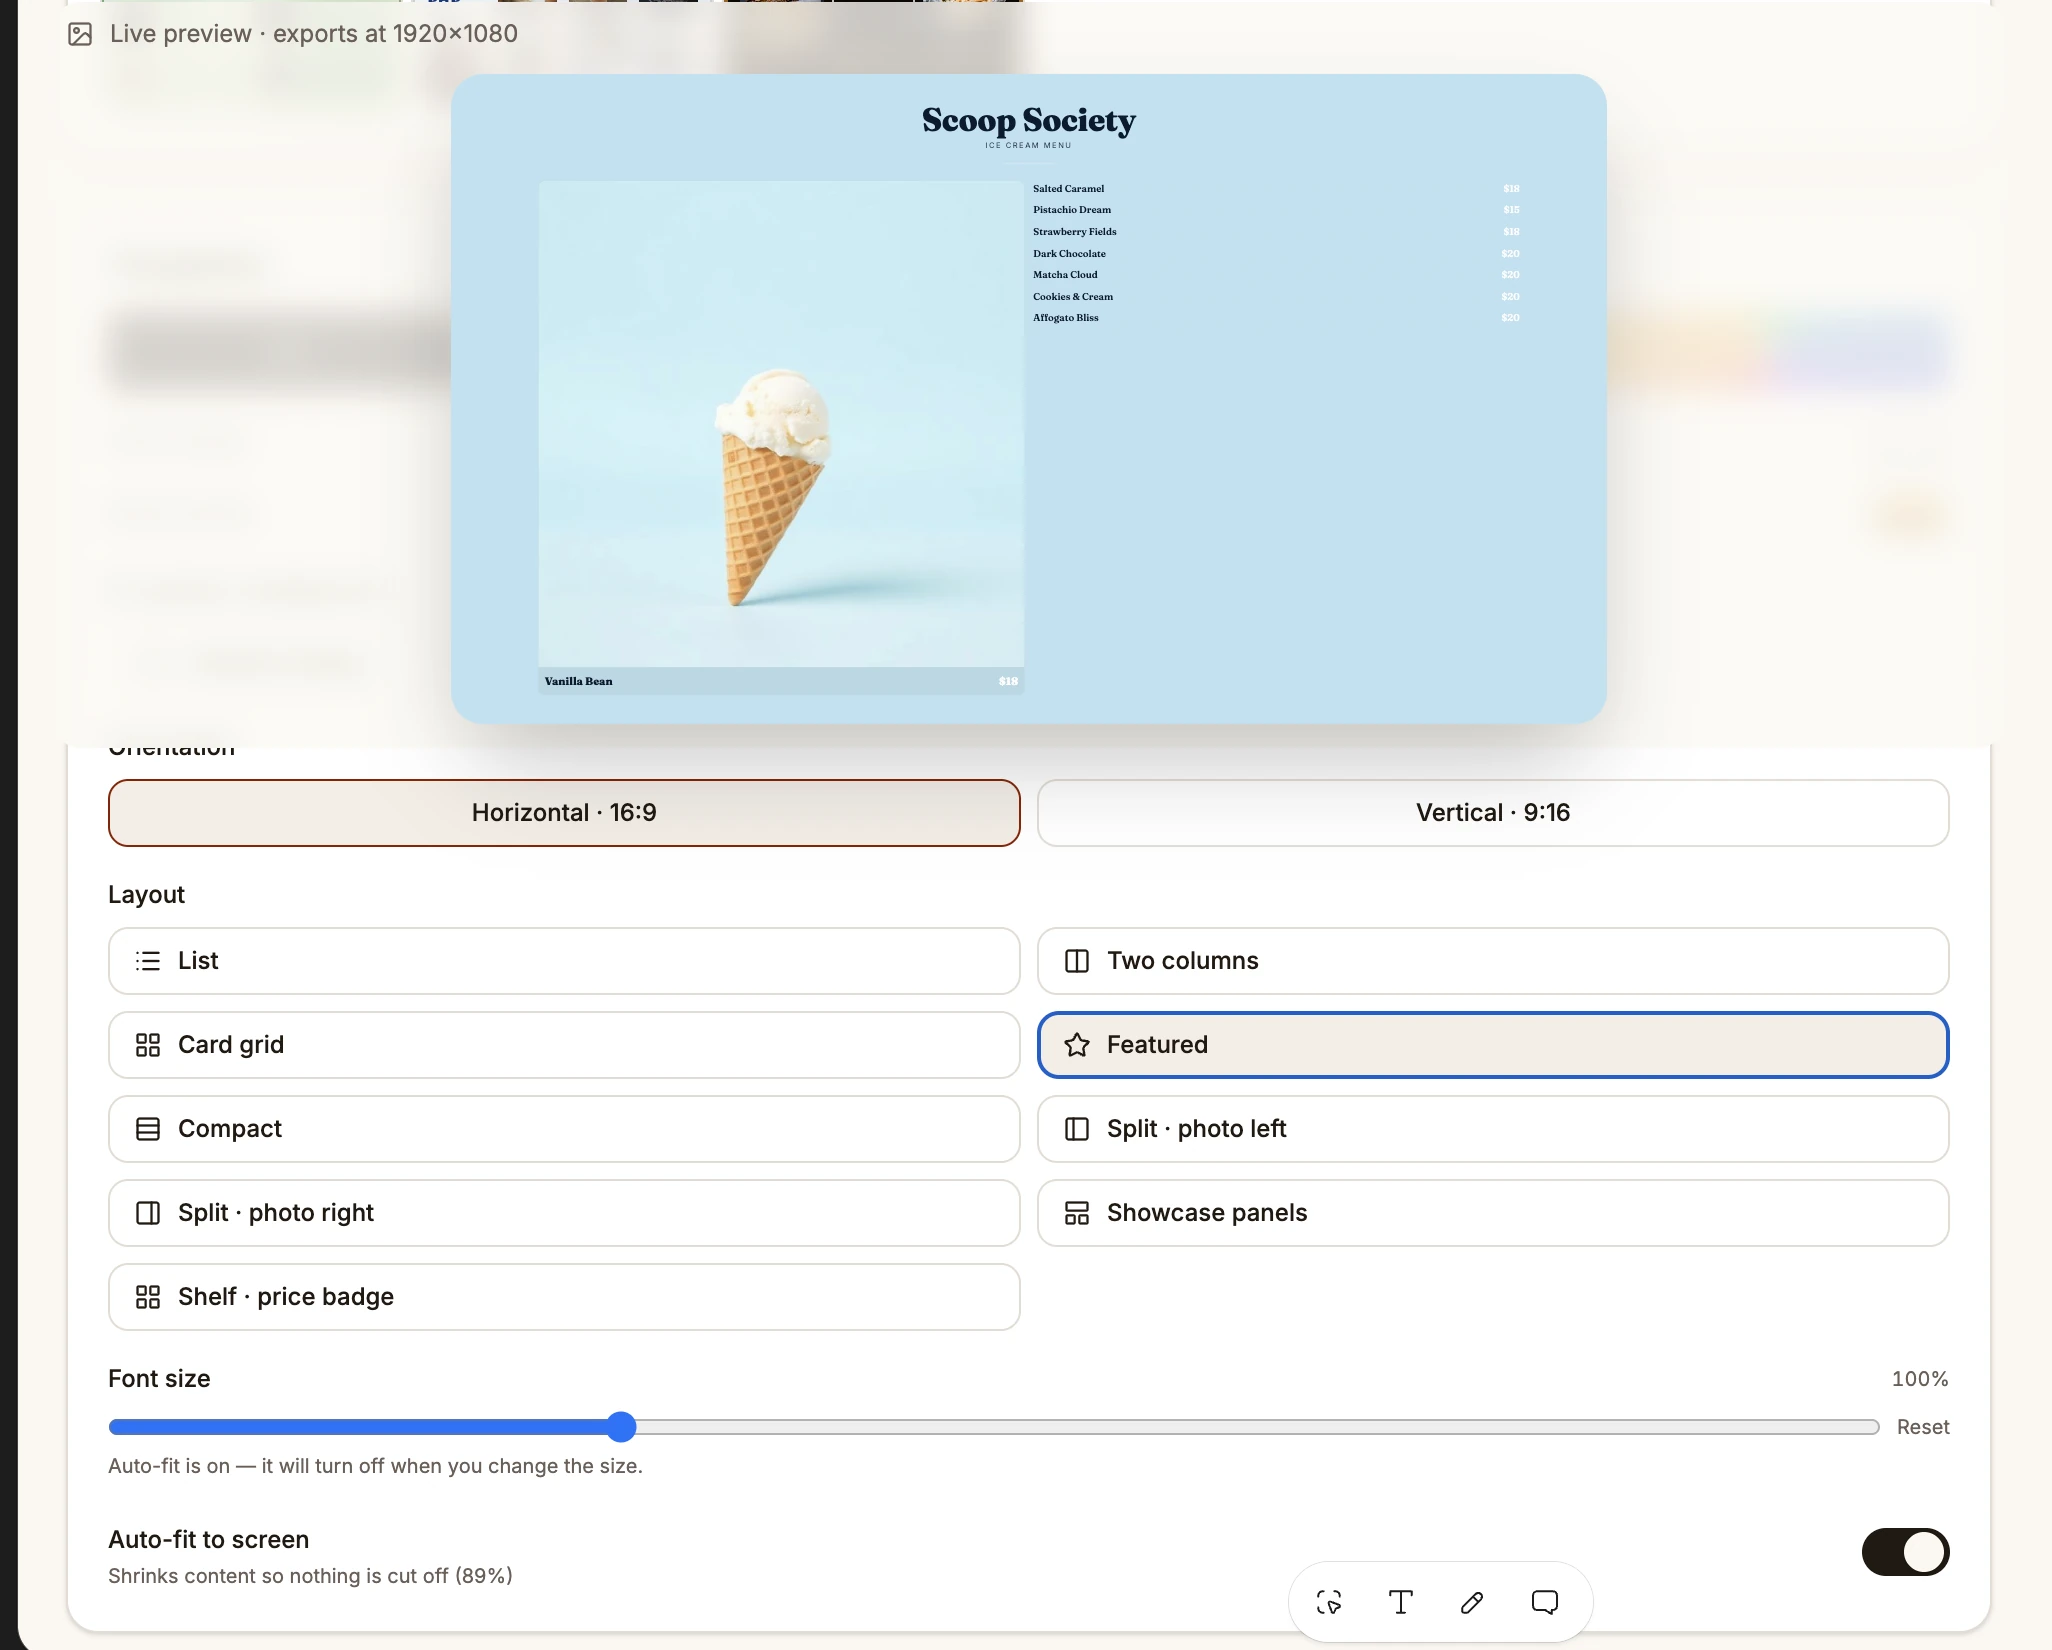
Step 4. Horizontal or Vertical screen
If you have vertical screen, choose Vertical screen orientation.
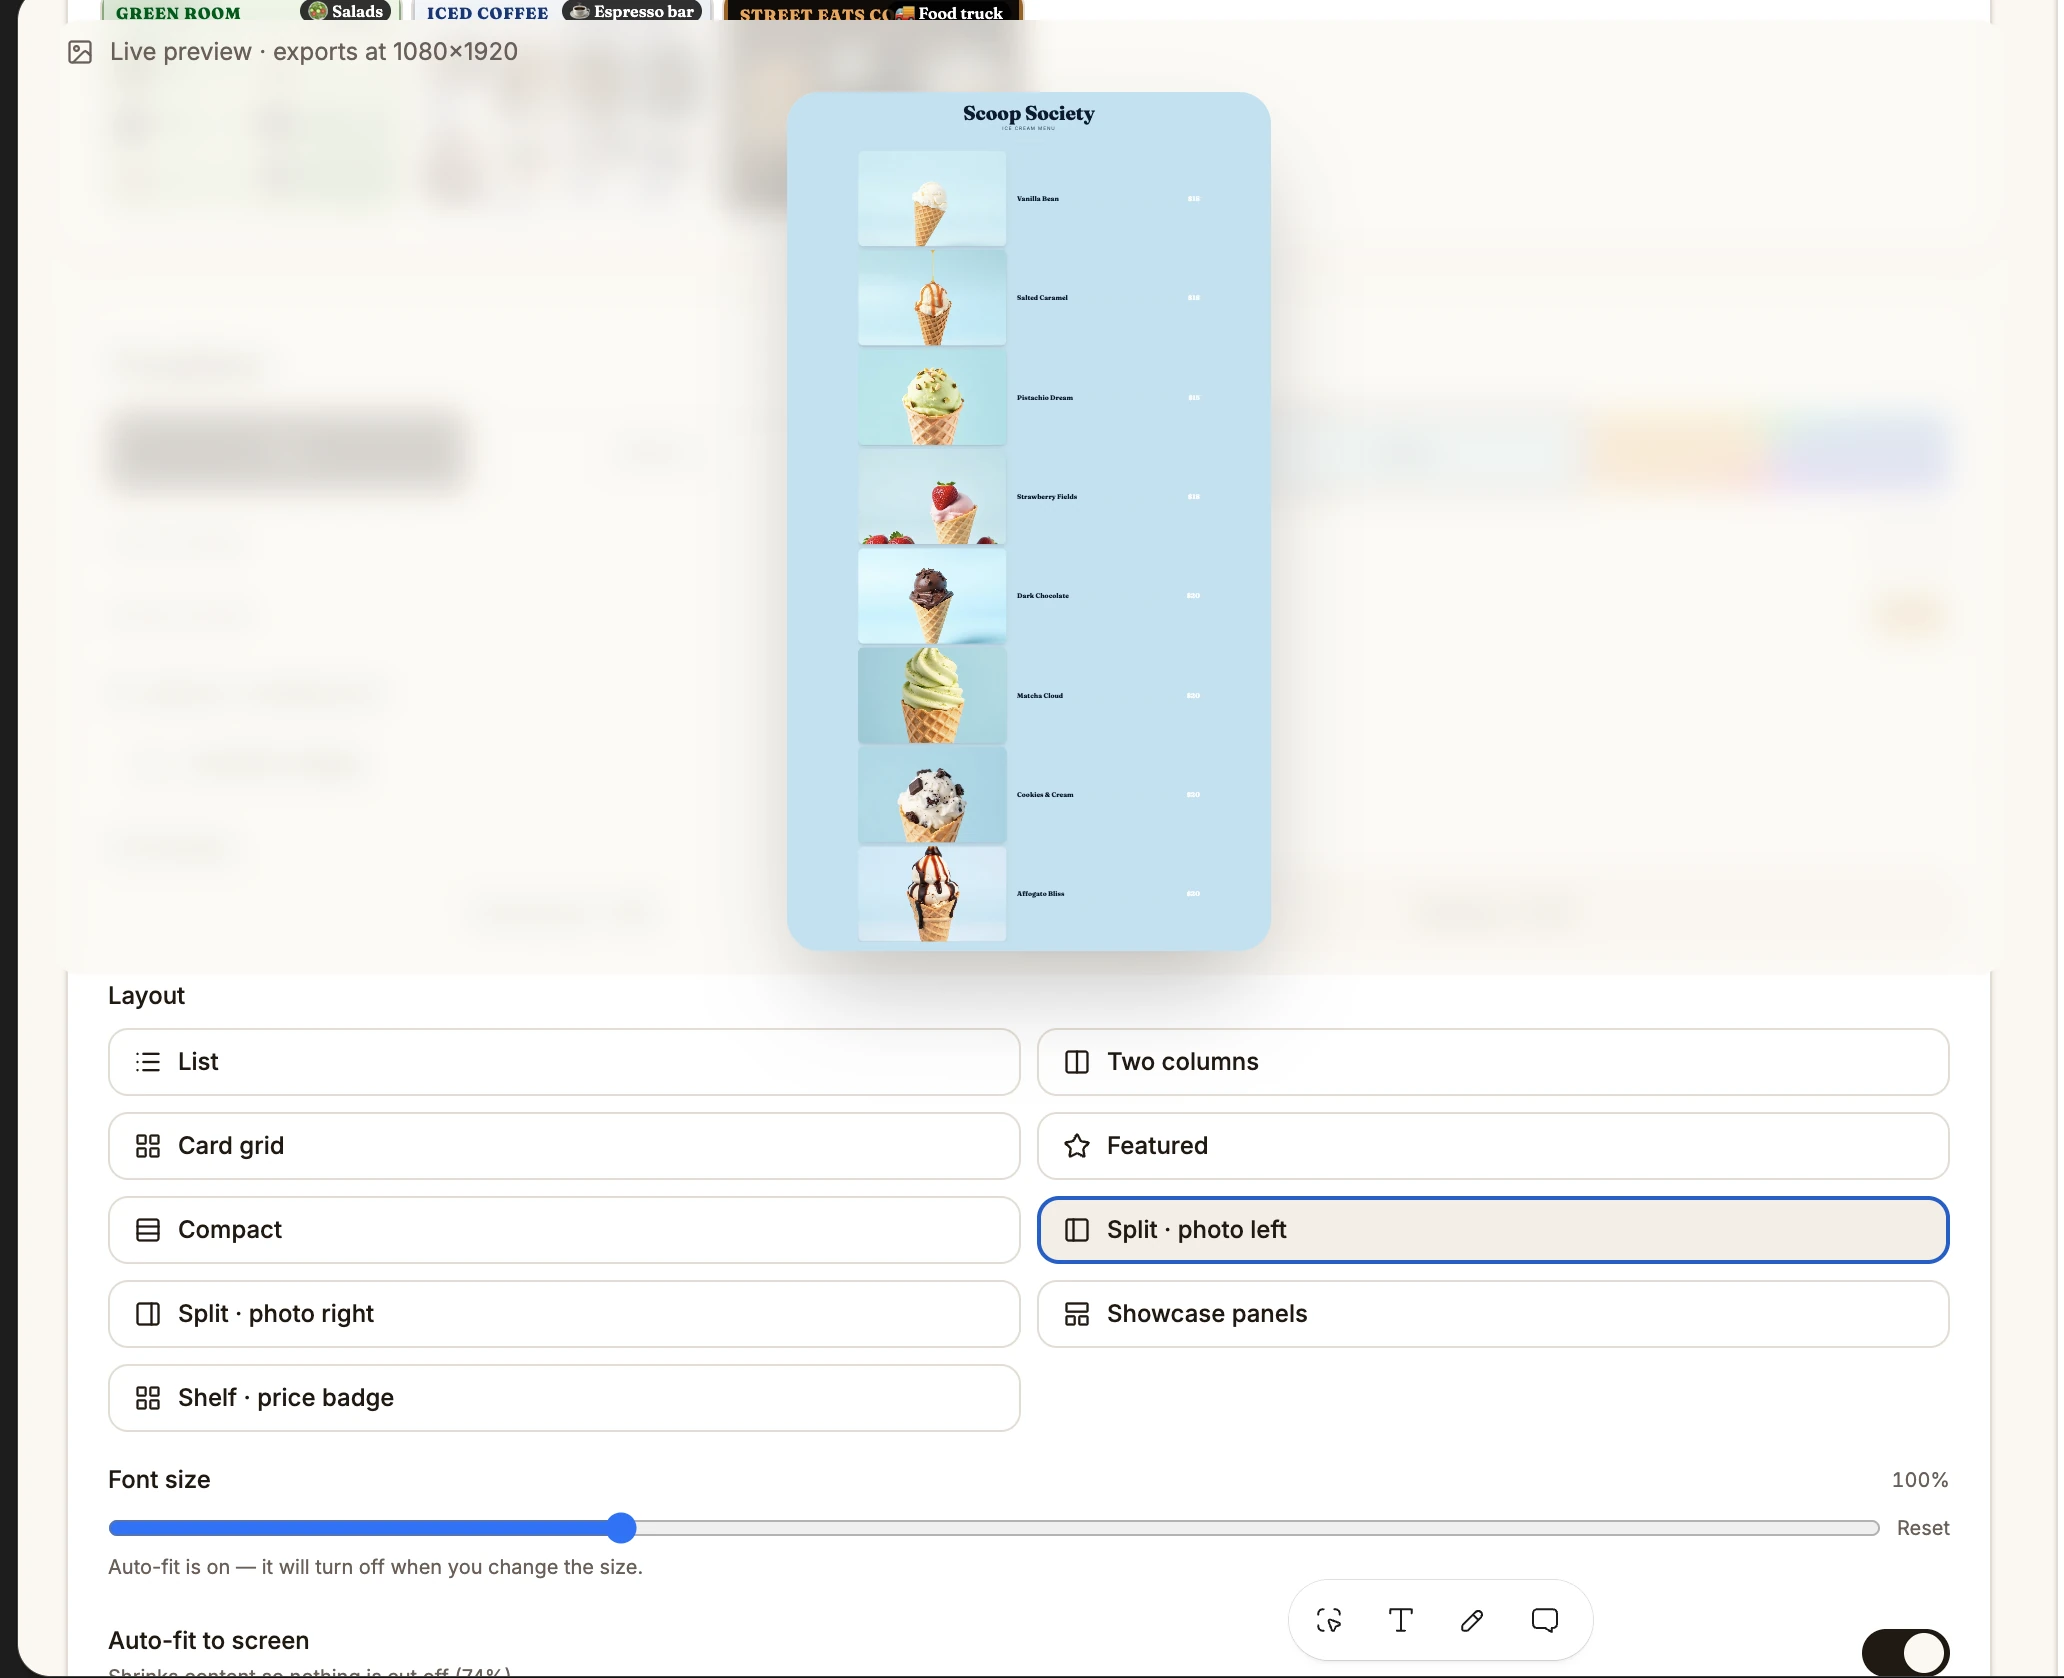
Step 5. Free Elements
You can add text and images anywhere on the canvas. Use the panel below the preview on the left to insert new elements, then drag them into place.
Upload your logo, choose your brand colors, and update the fonts to match your visual identity. Small changes can make a template feel completely custom.
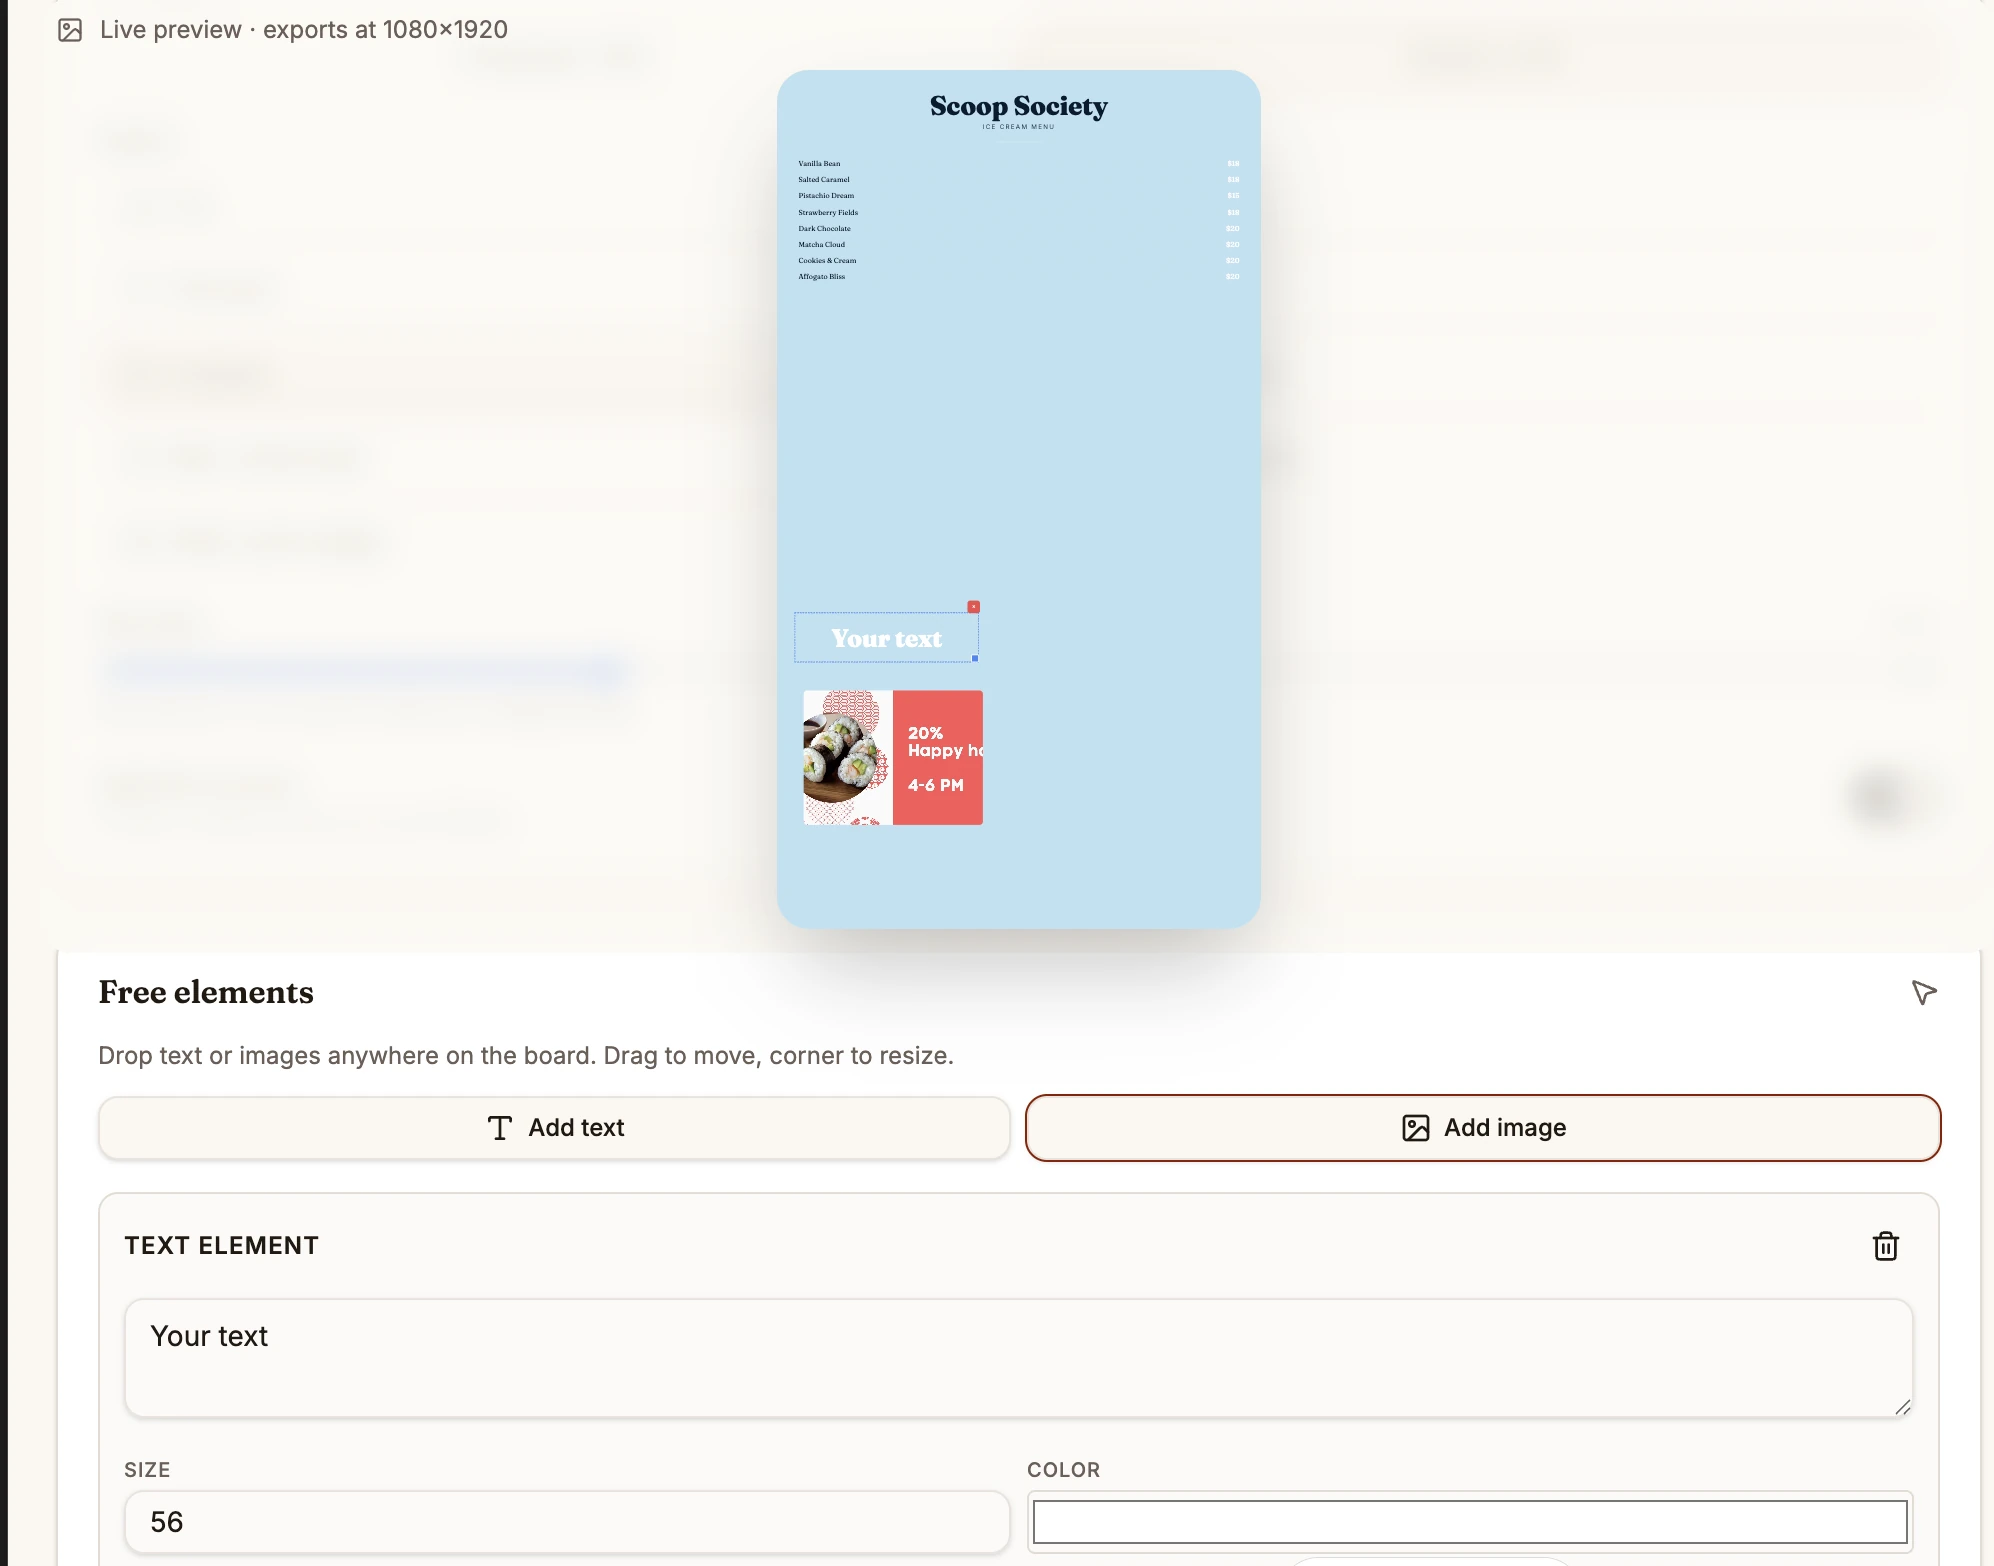
Step 6. Keep your versions
- You can save menu drafts and come back to them later. It will be stored locally in your browser.
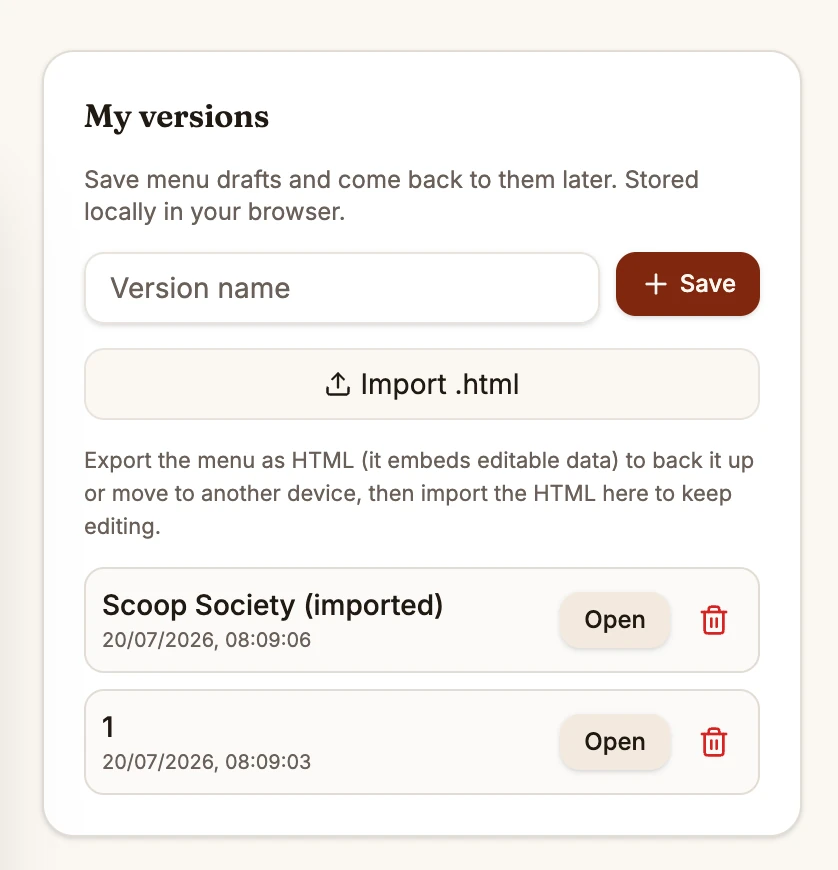
2. You can Export HTML and upload it later to continue editing from another device.

Step 7. Auto-fit
Don’t forget to preview how your menu will look on screen. Turn on Auto-fit in the left panel to automatically shrink content so nothing gets cut off.

Pro Tip: Organize Your Menu
A clear structure helps customers decide faster.
Group your products into categories such as:
- Coffee
- Tea
- Breakfast
- Sandwiches
- Desserts
- Seasonal Specials
Keep category names short and make sure the most popular products are easy to find.
Pro Tip. Add Images
Photos can make your menu much more engaging.
Upload images of your best-selling products, seasonal offers or signature dishes. A few high-quality photos usually work better than filling every section with images.
If you don’t have professional photography, start with your top-selling items and add more images over time.
Pro Tip. Highlight Promotions
Use banners, labels or colored sections to draw attention to offers you want customers to notice.
For example:
- New products
- Limited-time offers
- Meal deals
- Seasonal drinks
- Happy Hour
- QR codes for online ordering
Keeping promotions separate from the main menu helps them stand out without making the design feel crowded.
Pro Tip. Preview Your Design
Preview your menu as it will appear on your display.
Check that:
- Text is easy to read.
- Prices are clearly visible.
- Images look sharp.
- Categories are well organized.
- Promotions stand out.
If you’re designing for a TV mounted above a counter, step back a few feet while previewing to make sure everything remains readable.
Step 8. Publish to Your Screens
When your design is ready, upload it to your BuzzBlender media library.
From there you can:
- Add it to a playlist
- Publish it to one or multiple screens
- Update content remotely
- Schedule when it appears
There’s no need to copy files to USB drives or manually update every display.
Step 9. Schedule Automatic Menu Changes
Many businesses display different menus throughout the day.
With BuzzBlender, you can schedule content to change automatically.
For example:
- Breakfast menu in the morning
- Lunch menu in the afternoon
- Dinner menu in the evening
- Weekend specials
- Holiday promotions
Once the schedule is set, your screens update automatically.
Pro Tip. Keep Your Menu Up to Date
Menus change all the time.
Whether you’re introducing a seasonal drink, adjusting prices or removing an item that’s sold out, simply edit the design and publish the updated version.
Changes are delivered remotely, making it easy to keep every location in sync.
More Tips for Better Menu Design
A well-designed menu helps customers make decisions faster and can even increase sales.
Here are a few simple recommendations:
- Keep the layout clean and uncluttered.
- Use high-contrast colors for better readability.
- Limit yourself to two or three fonts.
- Highlight your best-selling or most profitable items.
- Use high-quality product photos.
- Leave enough spacing between sections.
- Review your menu regularly to keep prices and promotions up to date.
Remember, customers usually spend only a few seconds looking at a menu. The easier it is to scan, the better the experience.
Ready to Create Your Menu?
Choose a template, customize it with your own branding and publish it to your digital signage screens in minutes.
With BuzzBlender, you can manage menus across one location or hundreds of displays—all from a single cloud-based dashboard.
Menu Board Design FAQ
What is the BuzzBlender Menu Board Editor?
The BuzzBlender Menu Board Editor is an online menu board design tool that helps you create professional digital menu boards for restaurants, cafes, coffee shops, bakeries, food trucks, and other food businesses. Start with a ready-made template or create your own design from scratch.
Do I need design experience to create a menu board?
No. The editor is designed for anyone to create a professional restaurant menu board design without graphic design skills. Simply choose a template, update your products and prices, add your branding, and publish.
Can I create a digital menu board for a coffee shop?
Yes. The editor includes templates for coffee shop menu boards, cafe menus, restaurants, bakeries, bars, food trucks, and quick-service restaurants. Every template is fully customizable.
Can I customize my menu board design?
Yes. You can customize nearly every part of your digital menu board design
Can I start with a blank menu board?
Yes. If you prefer to design your own menu board from scratch, simply choose Blank Menu instead of using a template.
What menu board layouts are available?
BuzzBlender includes multiple menu board design layouts. You can switch layouts at any time while editing.
Can I design both landscape and portrait menu boards?
Yes. You can switch between horizontal (landscape) and vertical (portrait) orientations with one click, making it easy to design menus for TVs, kiosks, and portrait digital signage displays.
Can I upload my own logo and food photos?
Absolutely. Upload your own logo, menu item photos, promotional graphics, QR codes, and background images to create a branded digital menu board.
Can I save my menu board and continue editing later?
Yes. Your menu drafts are saved locally in your browser. You can also export your menu as an HTML file and continue editing on another computer.
What is Auto-Fit?
Auto-Fit automatically resizes your menu board design so all content stays visible on screen without overlapping or being cut off.
Can I schedule different menus throughout the day?
Yes. Schedule different digital menu boards to display automatically. Your screens update automatically based on your schedule.
Can I publish one menu to multiple screens?
Yes. Publish your digital menu board to one display or hundreds of screens from a single cloud dashboard.
Can I update my menu remotely?
Yes. Edit your menu, publish the changes, and every connected display updates remotely—no USB drives or manual updates required.
Is BuzzBlender suitable for digital signage menu boards?
Yes. BuzzBlender is built specifically for digital signage menu boards. Once your design is complete, you can publish it to one or multiple displays, schedule automatic changes, and manage everything remotely from the cloud.


