
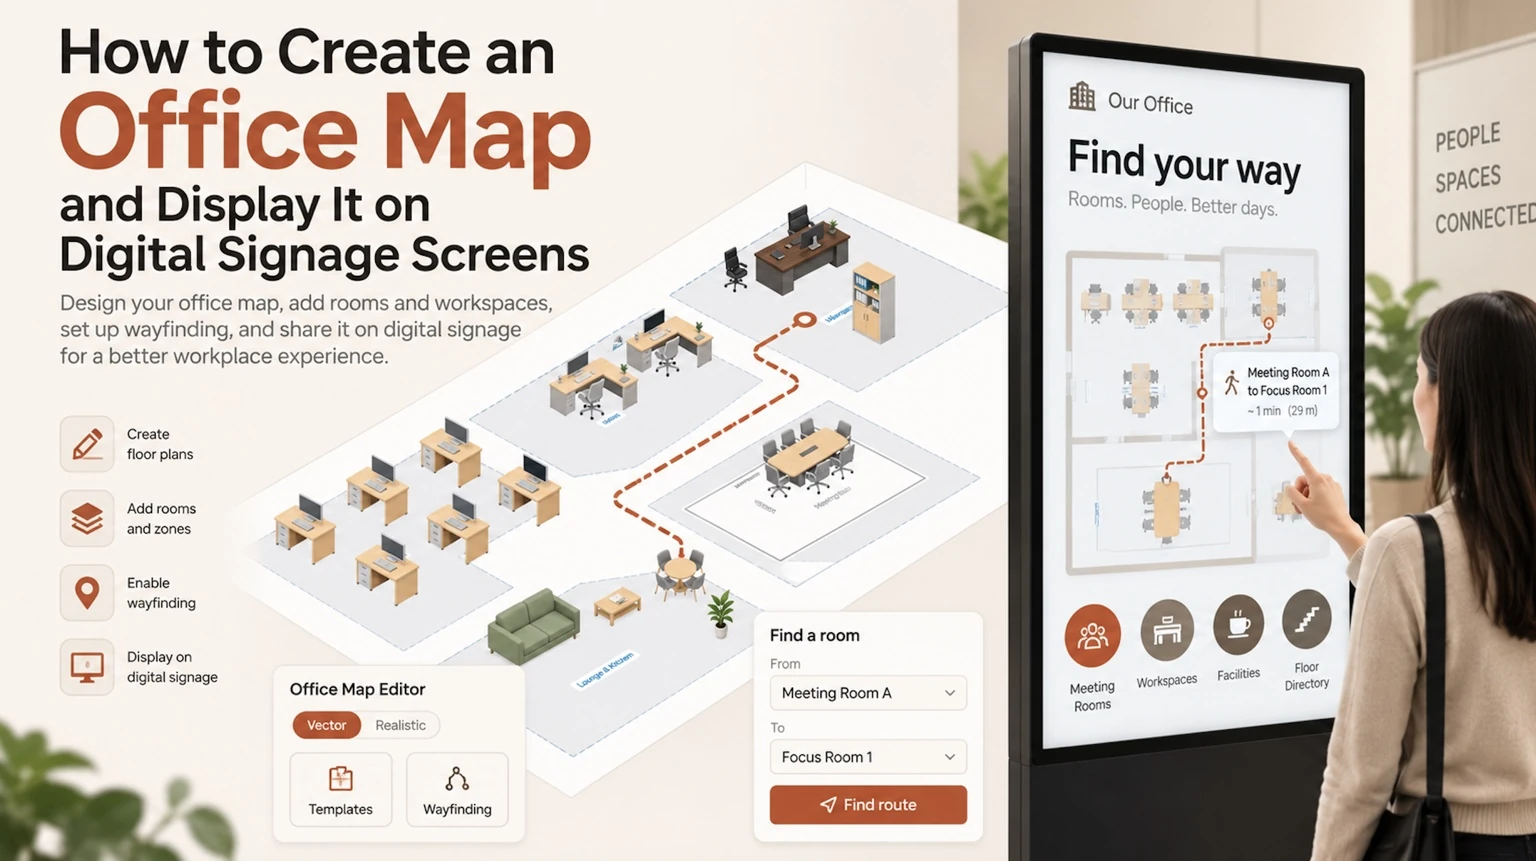
Finding a meeting room, department, available workspace or colleague shouldn’t require walking around the office asking for directions.
A digital office map can turn an existing TV or commercial display into a visual directory for employees and visitors. Instead of showing only a static floor plan, organizations can create a structured map with rooms, desks, departments and people, add wayfinding between locations, and make that information available on screens around the workplace.
With an Office Map Editor and BuzzBlender digital signage software, the workflow can be divided into two simple parts: create the office map first, then publish it to your office screens.
This guide explains the complete process.
Quickly, here’s how to show it on the screens:
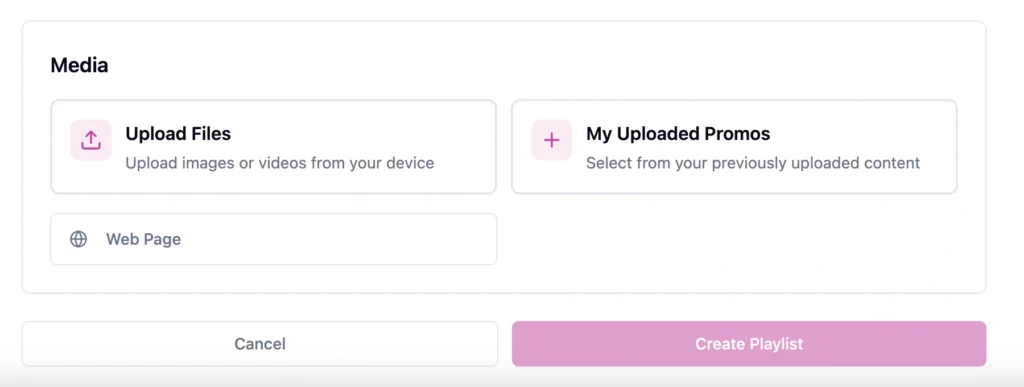
- In the map editor, click “Share Map”, then “Copy HTML code.”
- In BuzzBlender, open a playlist, then go to Media → Web Page → “HTML embed.”
- Give it a name, paste the code into the “HTML code for embedded app” box, and click “Add Embed.”
- After you make changes to the plan, click “Update the link.” The screens will refresh automatically, so you won’t need to paste the code again.
Use this link to create an interactive office map.
What Is a Digital Office Map?
A digital office map is a visual representation of a workplace designed for viewing on digital displays, computers or interactive screens.
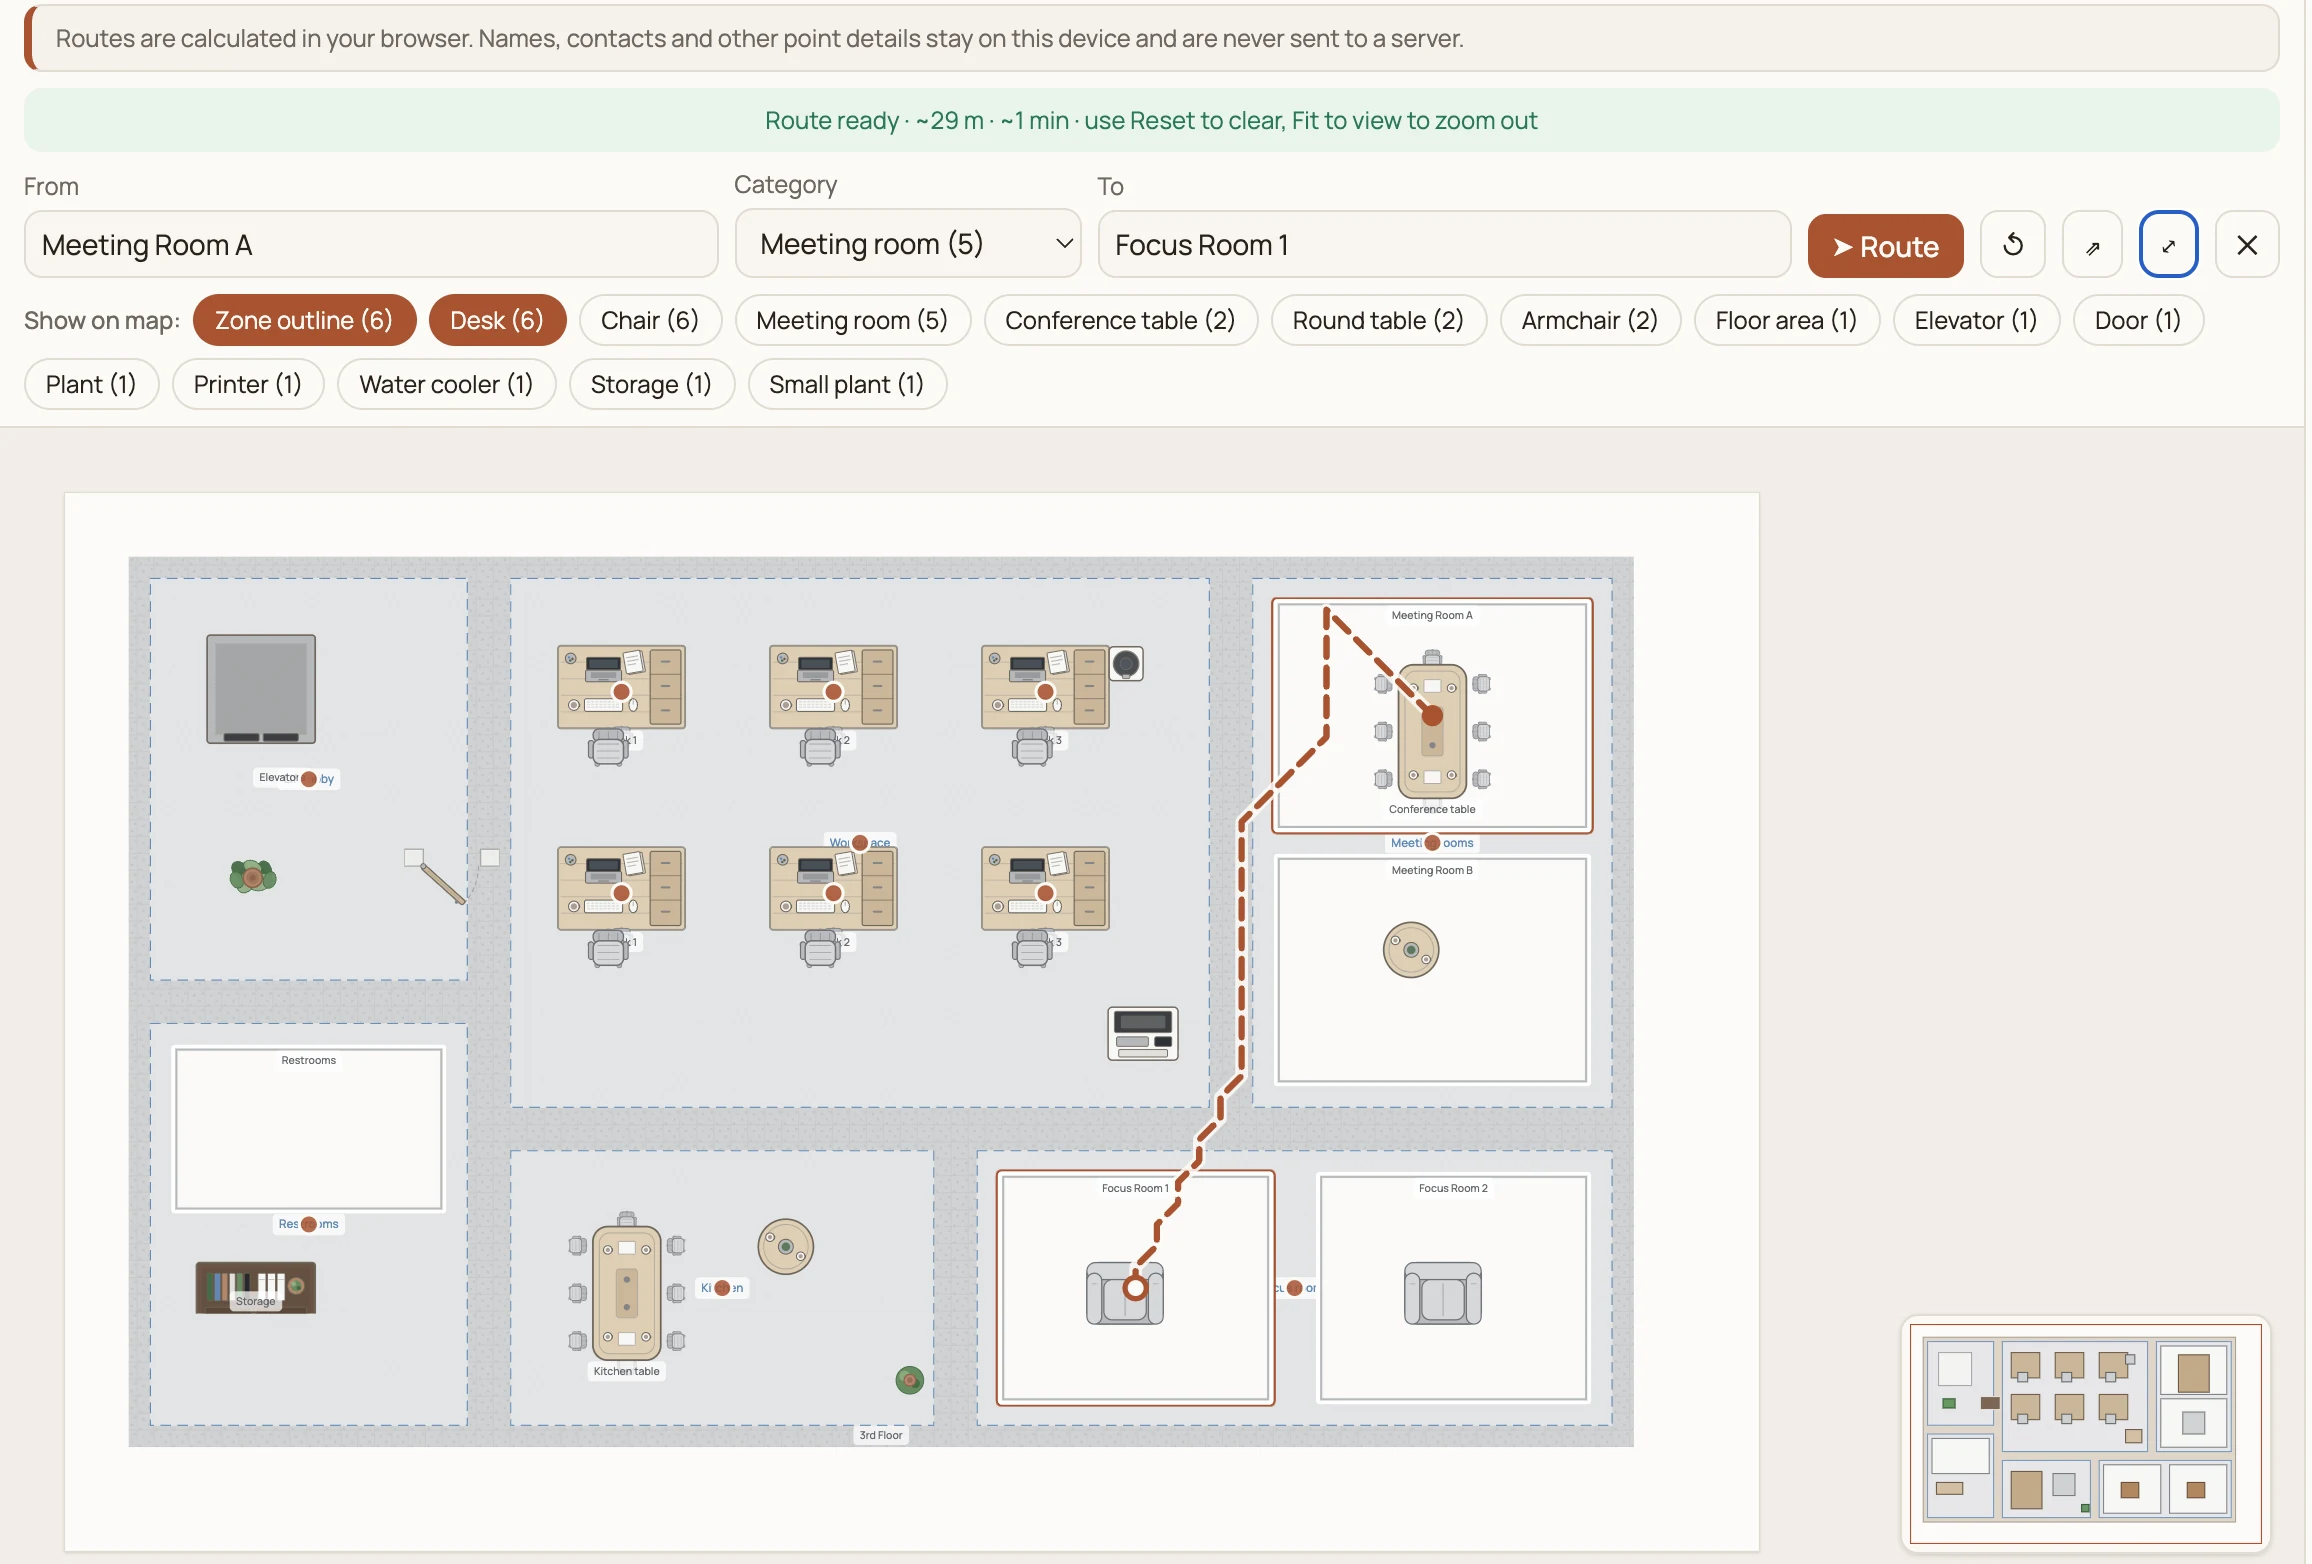
Unlike a simple image of a floor plan, an office map can contain structured information about the workplace. You can identify departments, meeting rooms and workstations, associate employees with desks, and create routes between different points.
This makes office maps useful in corporate offices, coworking spaces, campuses, reception areas and large workplaces where employees and visitors regularly need help finding their destination.
When combined with digital signage, the map becomes part of the workplace communication system.
For example, a screen near reception could show the ground-floor directory, while displays near elevators could show maps for individual floors.
Step 1: Start with an Office Map Template
The fastest way to build your map is to start from an existing template.
In Office Map Editor, open Templates and select an office layout that is close to your workplace. The selected template replaces the current floor and opens using the visual style in which it was designed.
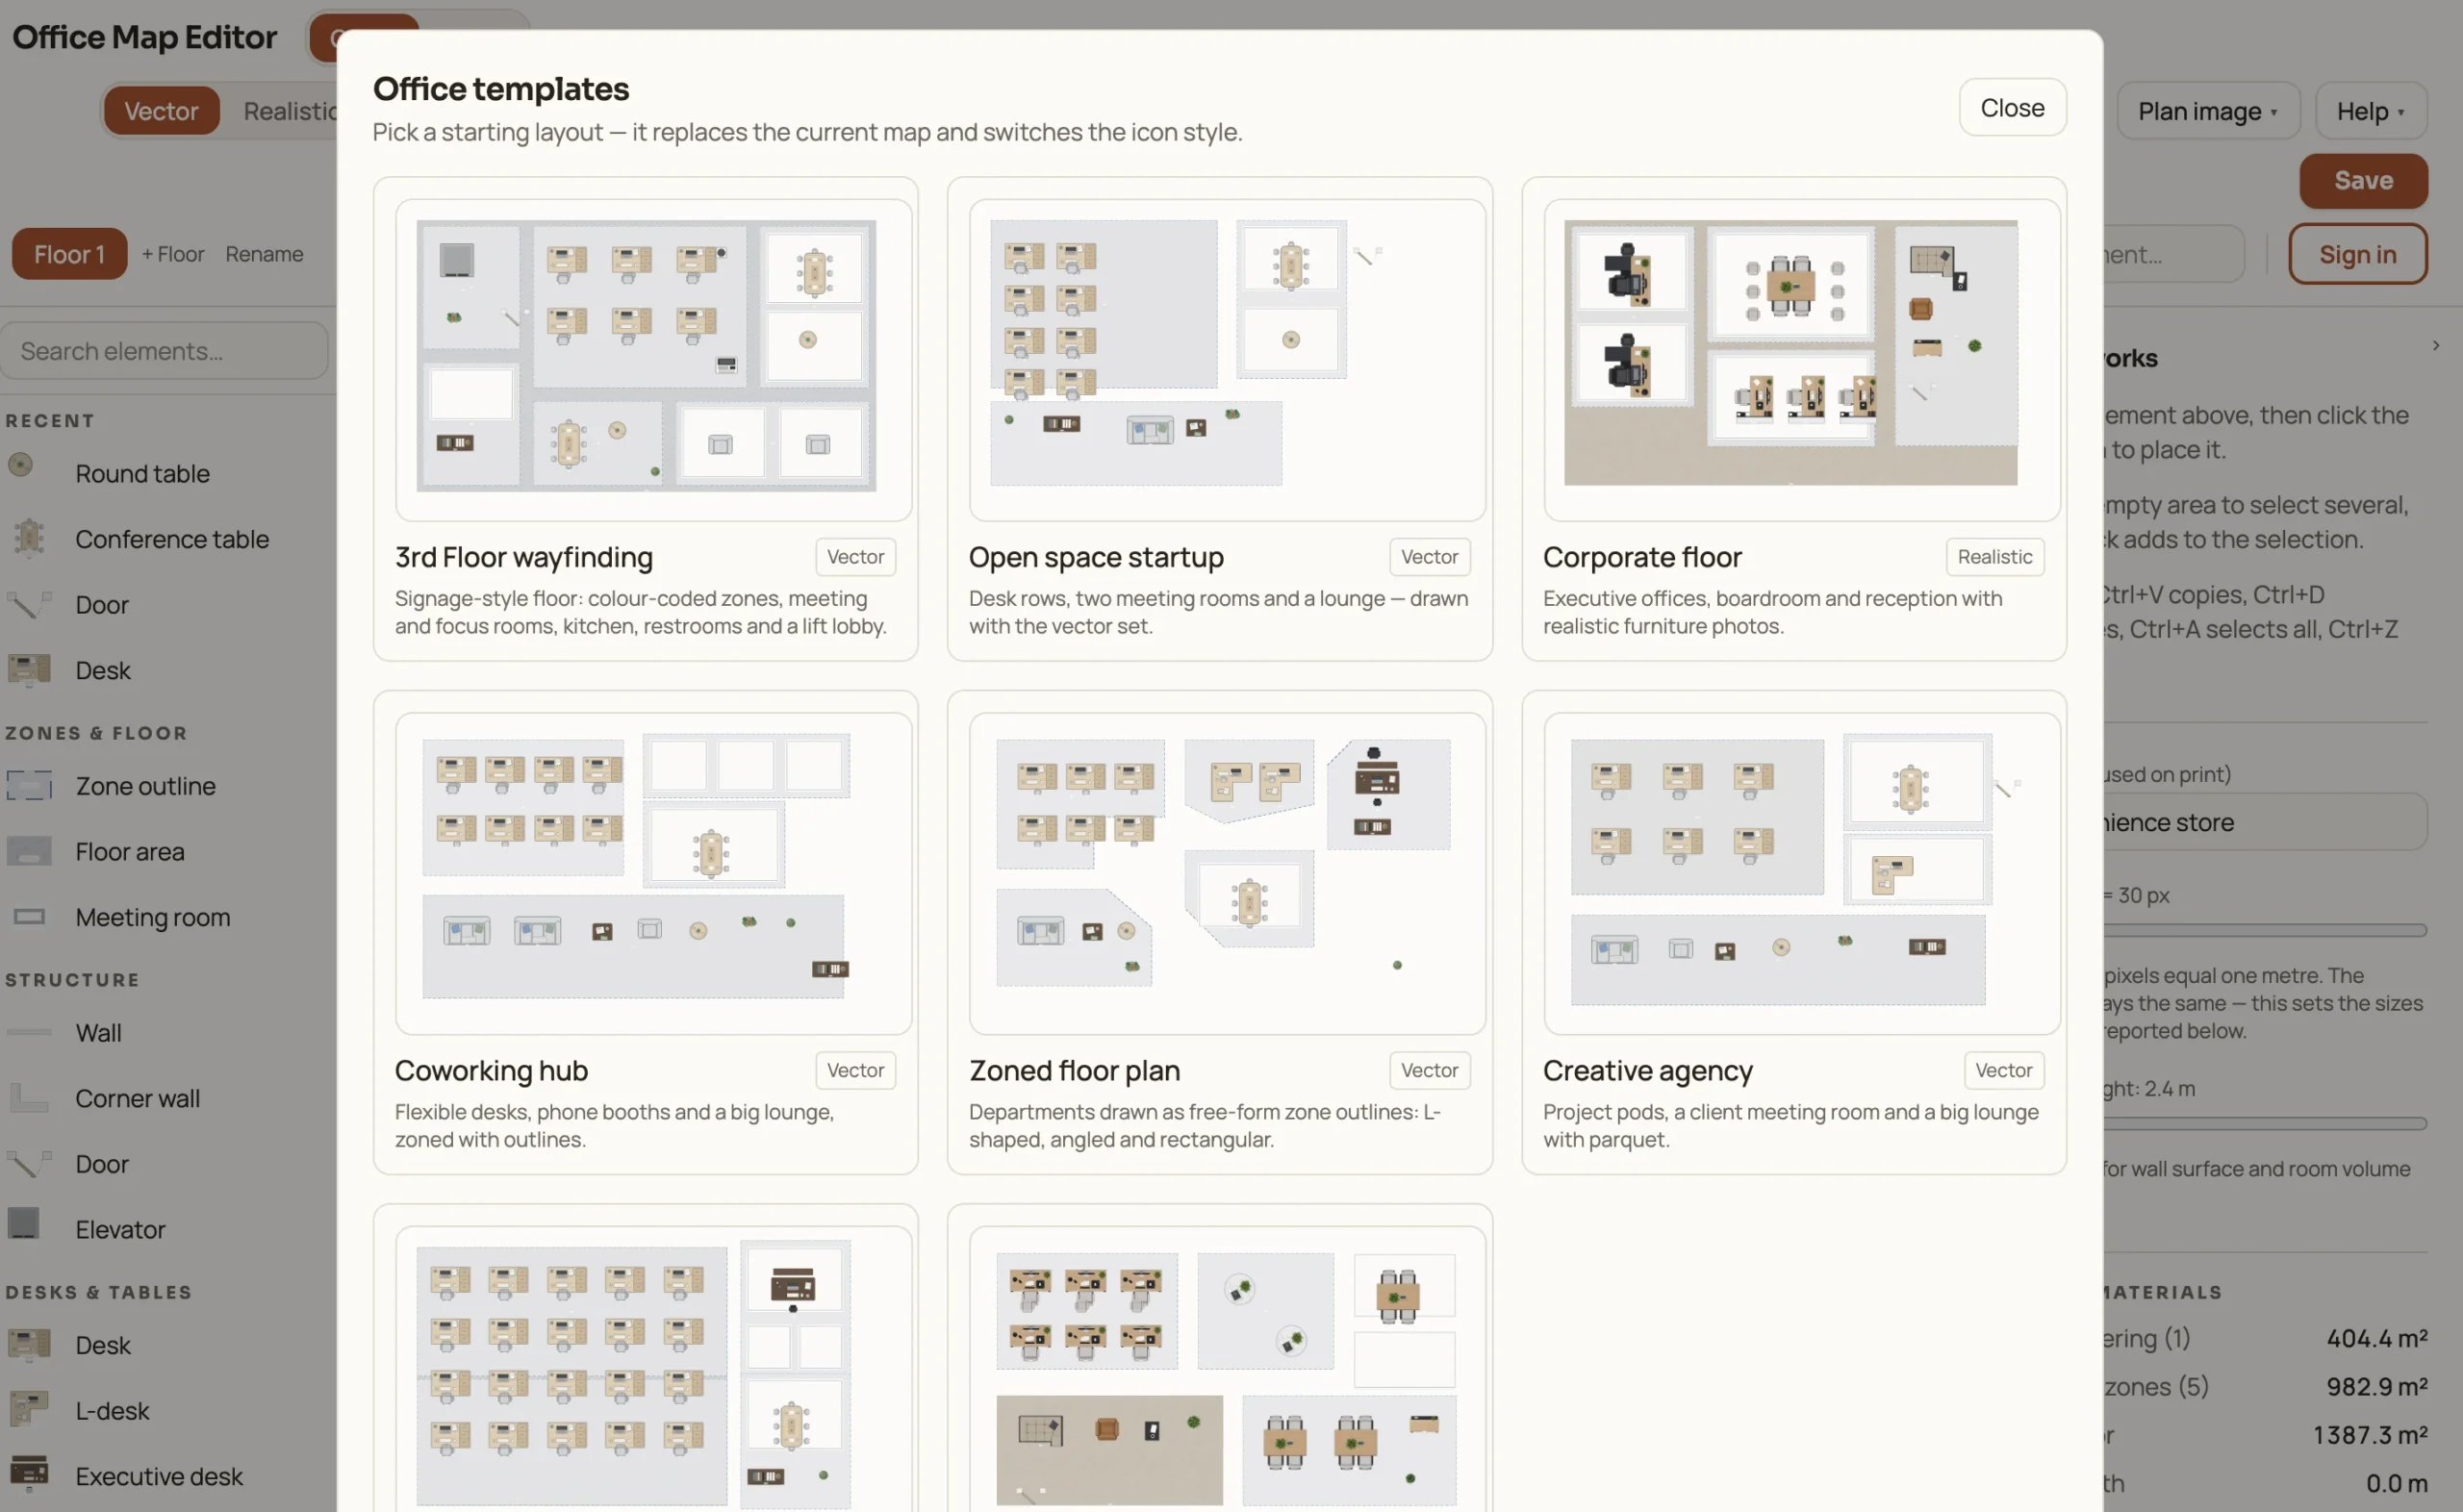
Templates are particularly useful when you don’t already have a digital floor plan. Instead of drawing everything from scratch, you can adapt an existing layout by moving walls, desks, meeting rooms and other objects.
The editor provides three visual styles — Vector, Realistic and Icons — as well as both 2D and isometric views.
Step 2: Import Your Existing Office Floor Plan
If your company already has an architectural plan or office layout, you don’t have to recreate it manually.
Open Plan image and upload an image or a PDF page containing your floor plan.
You can adjust its opacity and use the imported plan as a reference while drawing the digital version on top. The editor also includes an Auto-detect walls option that can convert clear lines in the uploaded plan into actual walls.
This provides a practical workflow:
existing PDF or image → import into Office Map Editor → trace or detect walls → add rooms and furniture → create a screen-ready map.
Once the structure has been recreated, the original background plan can be removed.
Step 3: Build the Office Layout
Next, start adding the physical elements of your workplace.
Office Map Editor provides an element palette on the left side of the workspace. Select an element and then click the plan to place it. Objects can be moved, resized and rotated directly on the map.
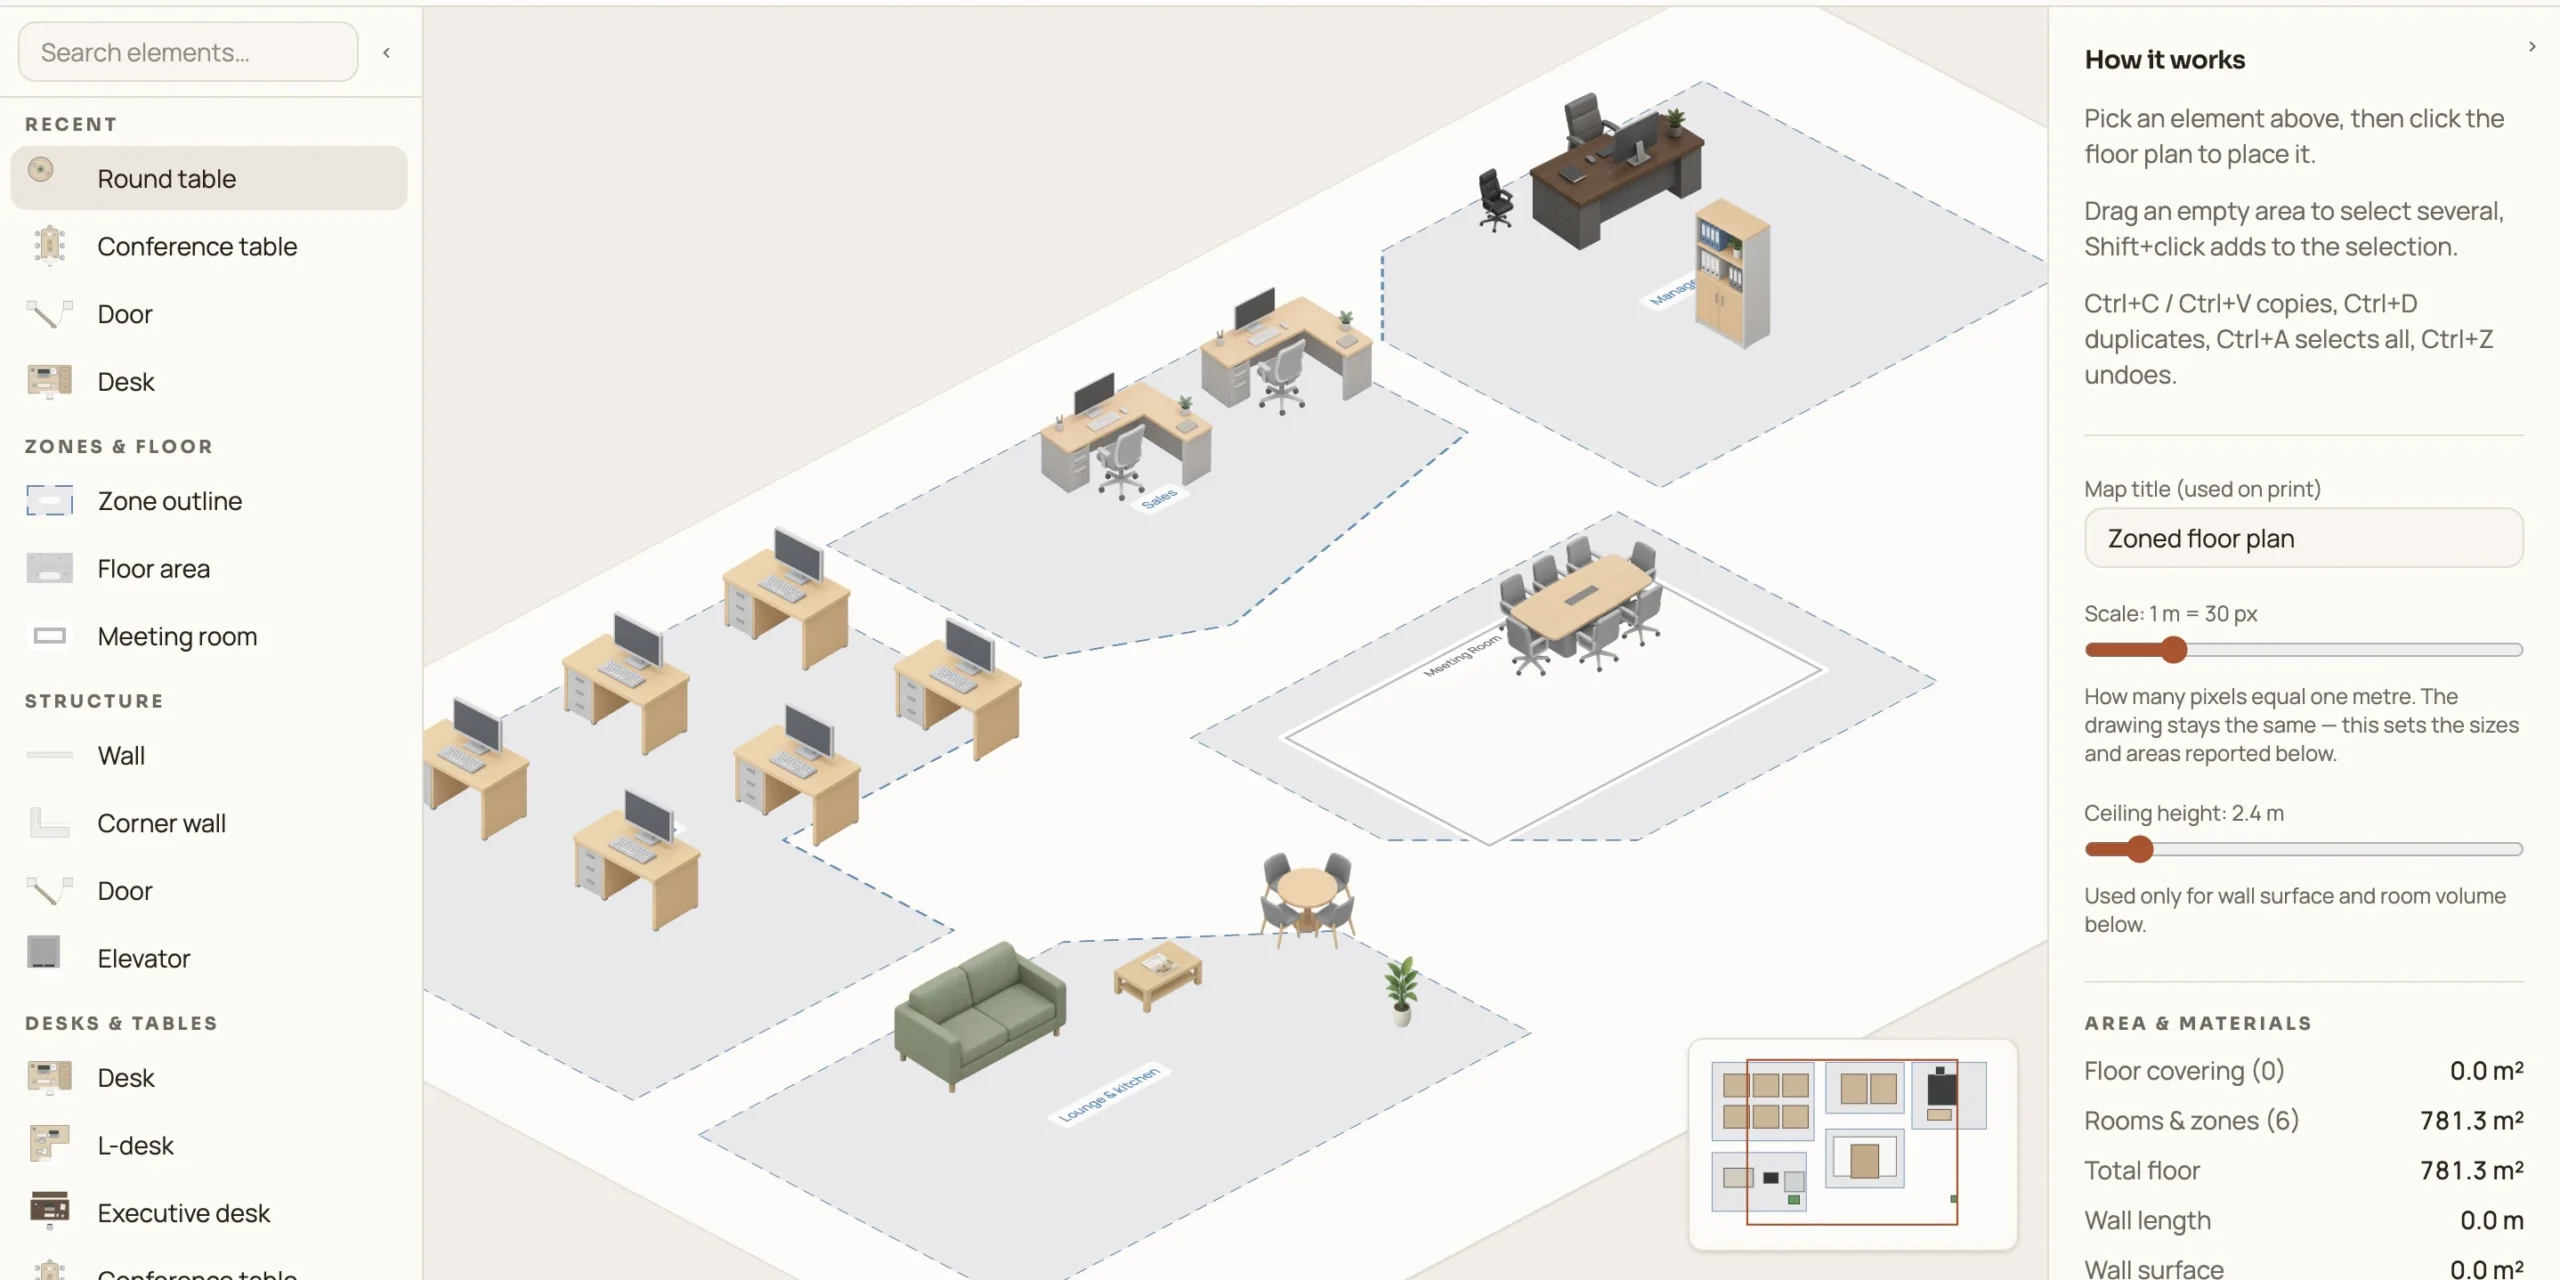
Walls can be drawn continuously to create rooms and corridors. When walls touch, the editor automatically connects them. Walls can also snap to existing corners and intersections.
You can then add desks, chairs, meeting tables and other workplace furniture.
For larger layouts, multiple elements can be selected and edited together. Objects can also be copied, duplicated, grouped and spaced evenly, making it much faster to build areas containing repeated desk configurations.
Step 4: Create Rooms, Departments and Zones
A useful office map needs more than furniture.
Create zones to identify departments or specific workplace areas. You can draw a zone by defining its corners and then closing the shape. Zones can subsequently be renamed, moved and reshaped.
For example, your office map might contain:
| Map element | Example |
|---|---|
| Department | Marketing |
| Department | Finance |
| Room | Meeting Room A |
| Room | Boardroom |
| Workspace | Desk 24 |
| Facility | Kitchen |
| Facility | Reception |
| Facility | Restrooms |
This structure makes the map much easier to understand when it is eventually displayed on a large office screen.
Step 5: Add Employees to the Office Map
One of the more useful capabilities of Office Map Editor is the ability to associate people with physical locations.
For desks, chairs and meeting tables, the properties panel includes “+ Who sits here”. This lets you associate a person with a specific workspace.
You can also create custom fields using “+ Field.”
For example, an object could contain a department or asset number.
The search field can then locate a person, desk or department on the plan.
In a large office, that turns a floor plan into something closer to a workplace directory.
Instead of asking, “Where does Alex from Finance sit?”, an employee can search the map and locate the relevant workstation.
Step 6: Create Multiple Office Floors
For multi-storey offices, each floor can have its own map.
Office Map Editor provides floor tabs below the toolbar. Select + Floor to add another level and rename it according to your building structure. Each floor is stored separately and saved automatically.
For example:
Ground Floor → Reception and visitor areas
Floor 1 → Sales and Marketing
Floor 2 → Finance and Management
Floor 3 → Meeting rooms and coworking areas
This structure is especially useful when digital signage displays are installed next to elevators or entrances to individual floors.
Step 7: Preview the Office in 2D or 3D
Sometimes a traditional floor plan provides the clearest navigation. In other situations, an isometric visualization can make the workplace easier to understand.

Office Map Editor therefore allows you to switch between 2D and Isometric views.
In the 3D view, elements — including walls — can have individual heights and elevation above the floor.
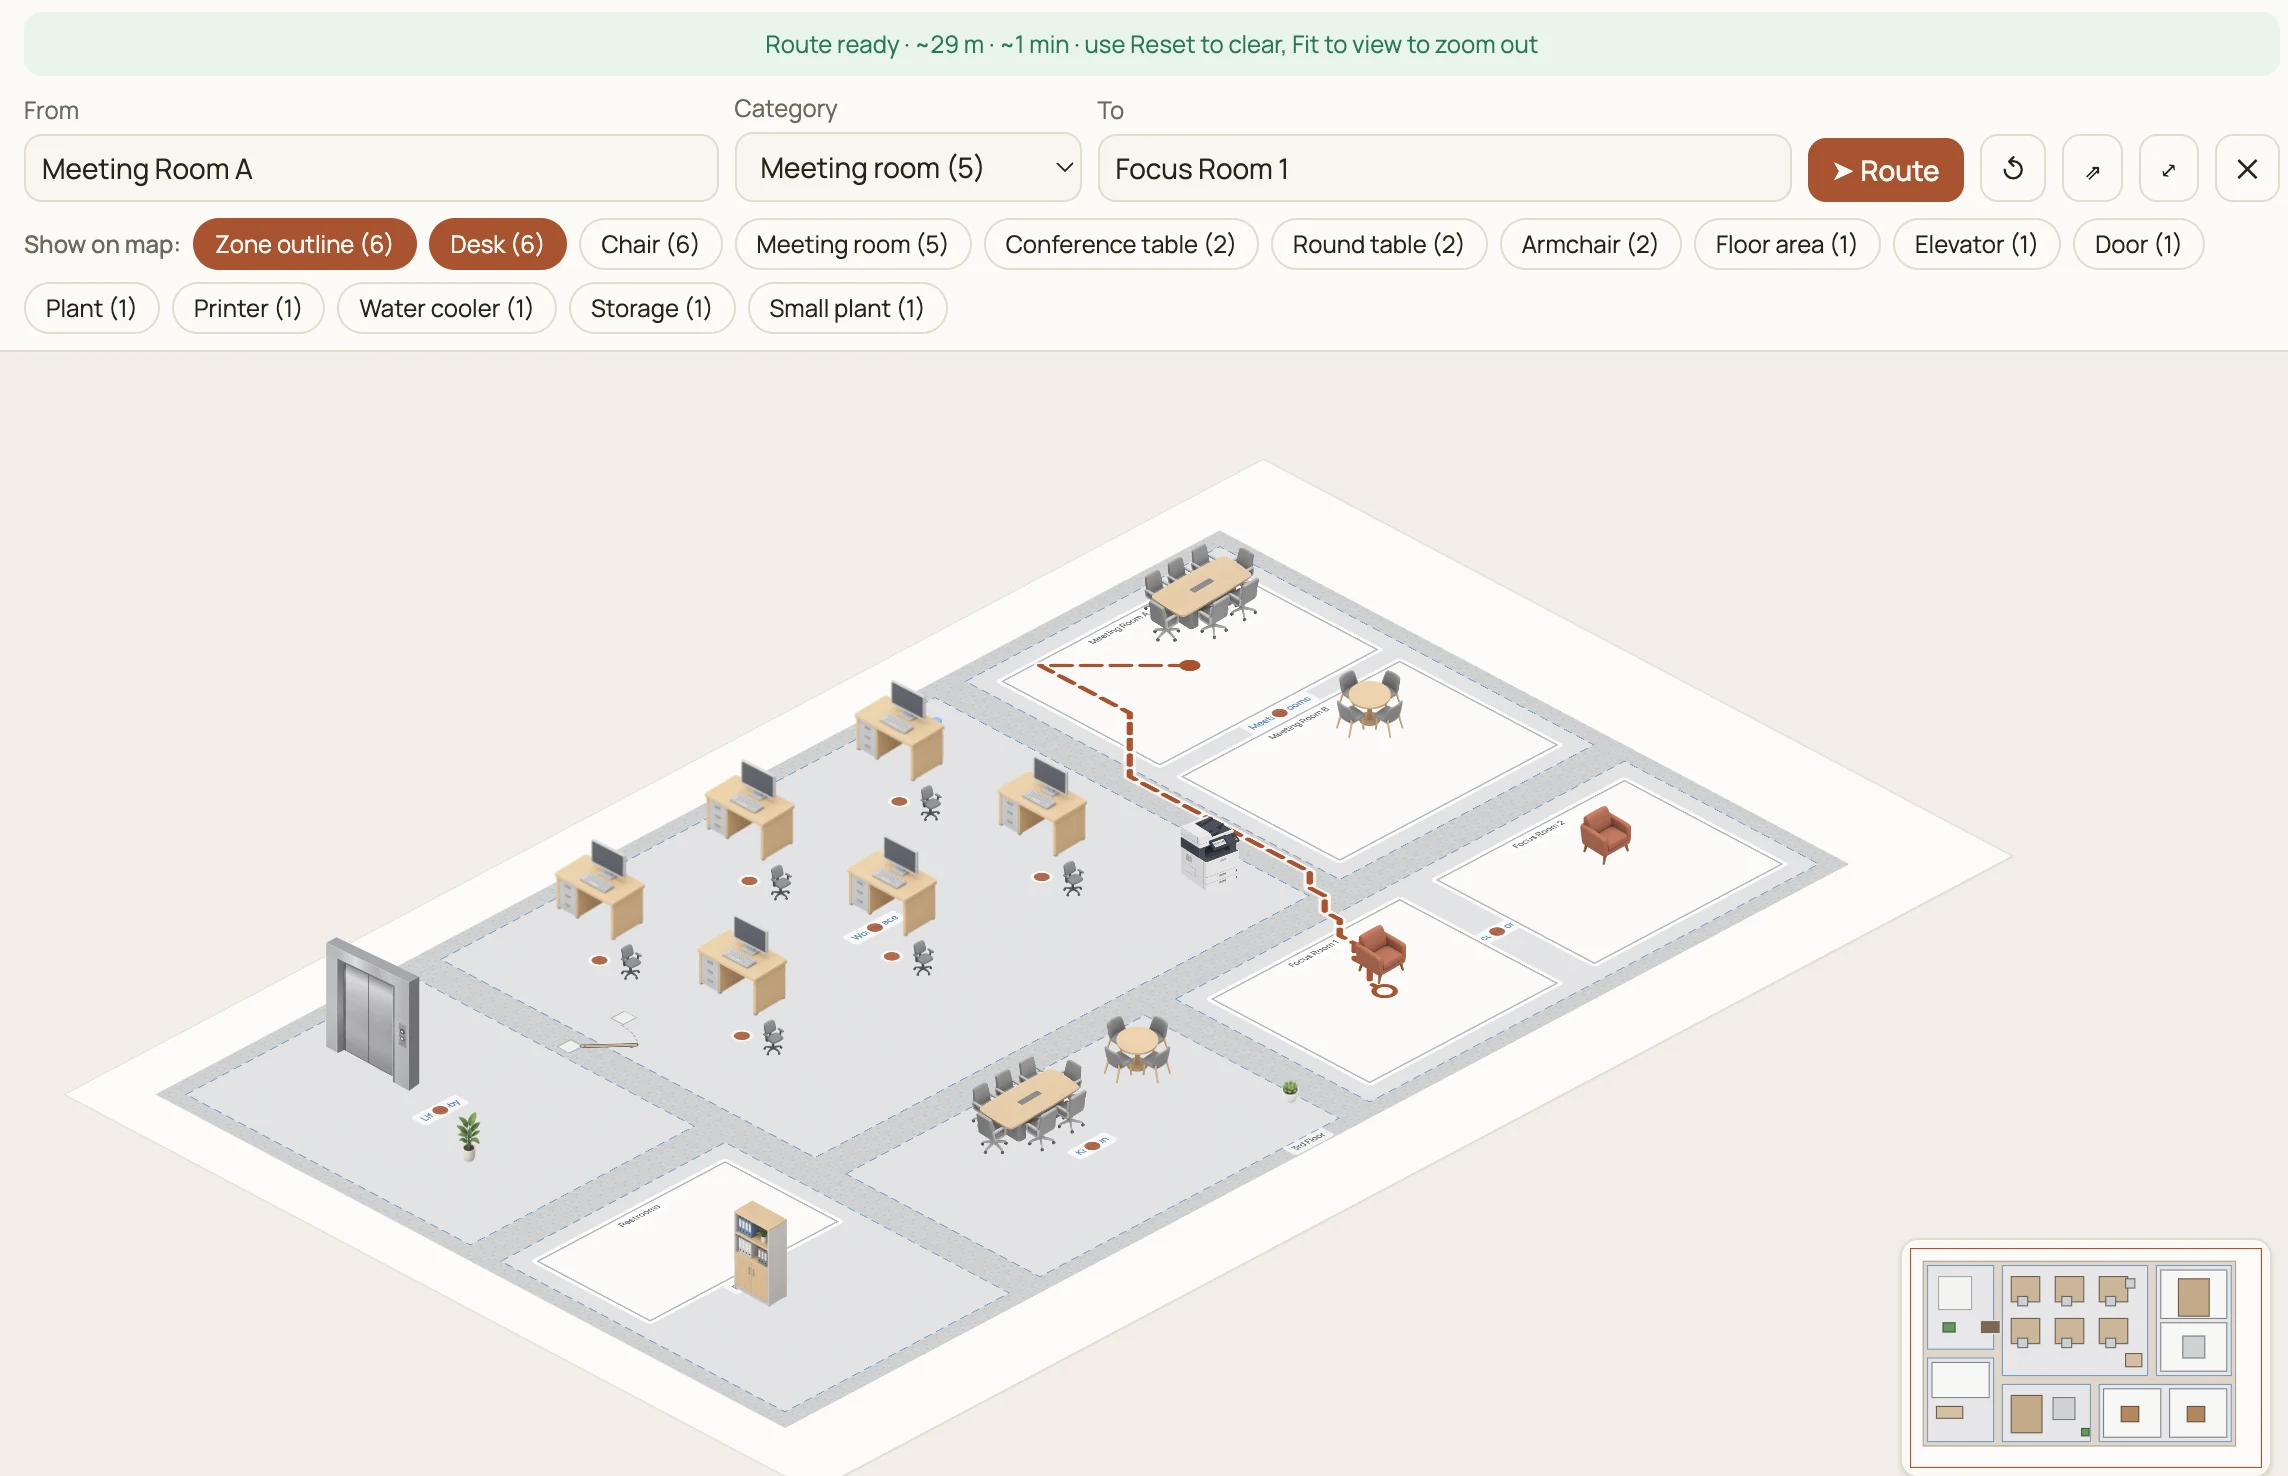
For digital signage, it is worth testing both versions on the actual screen.
A clean 2D map may be easier to read from several metres away, while an isometric view can provide stronger visual context for reception areas or visitor-facing displays.
Step 8: Add Office Wayfinding
A floor map becomes considerably more useful when people can see how to reach their destination.
Office Map Editor includes a dedicated Wayfinding feature.
The user selects or searches for a starting point under From and a destination under To, then chooses Route. The system calculates a route that navigates around walls and furniture and displays both the distance and estimated walking time.
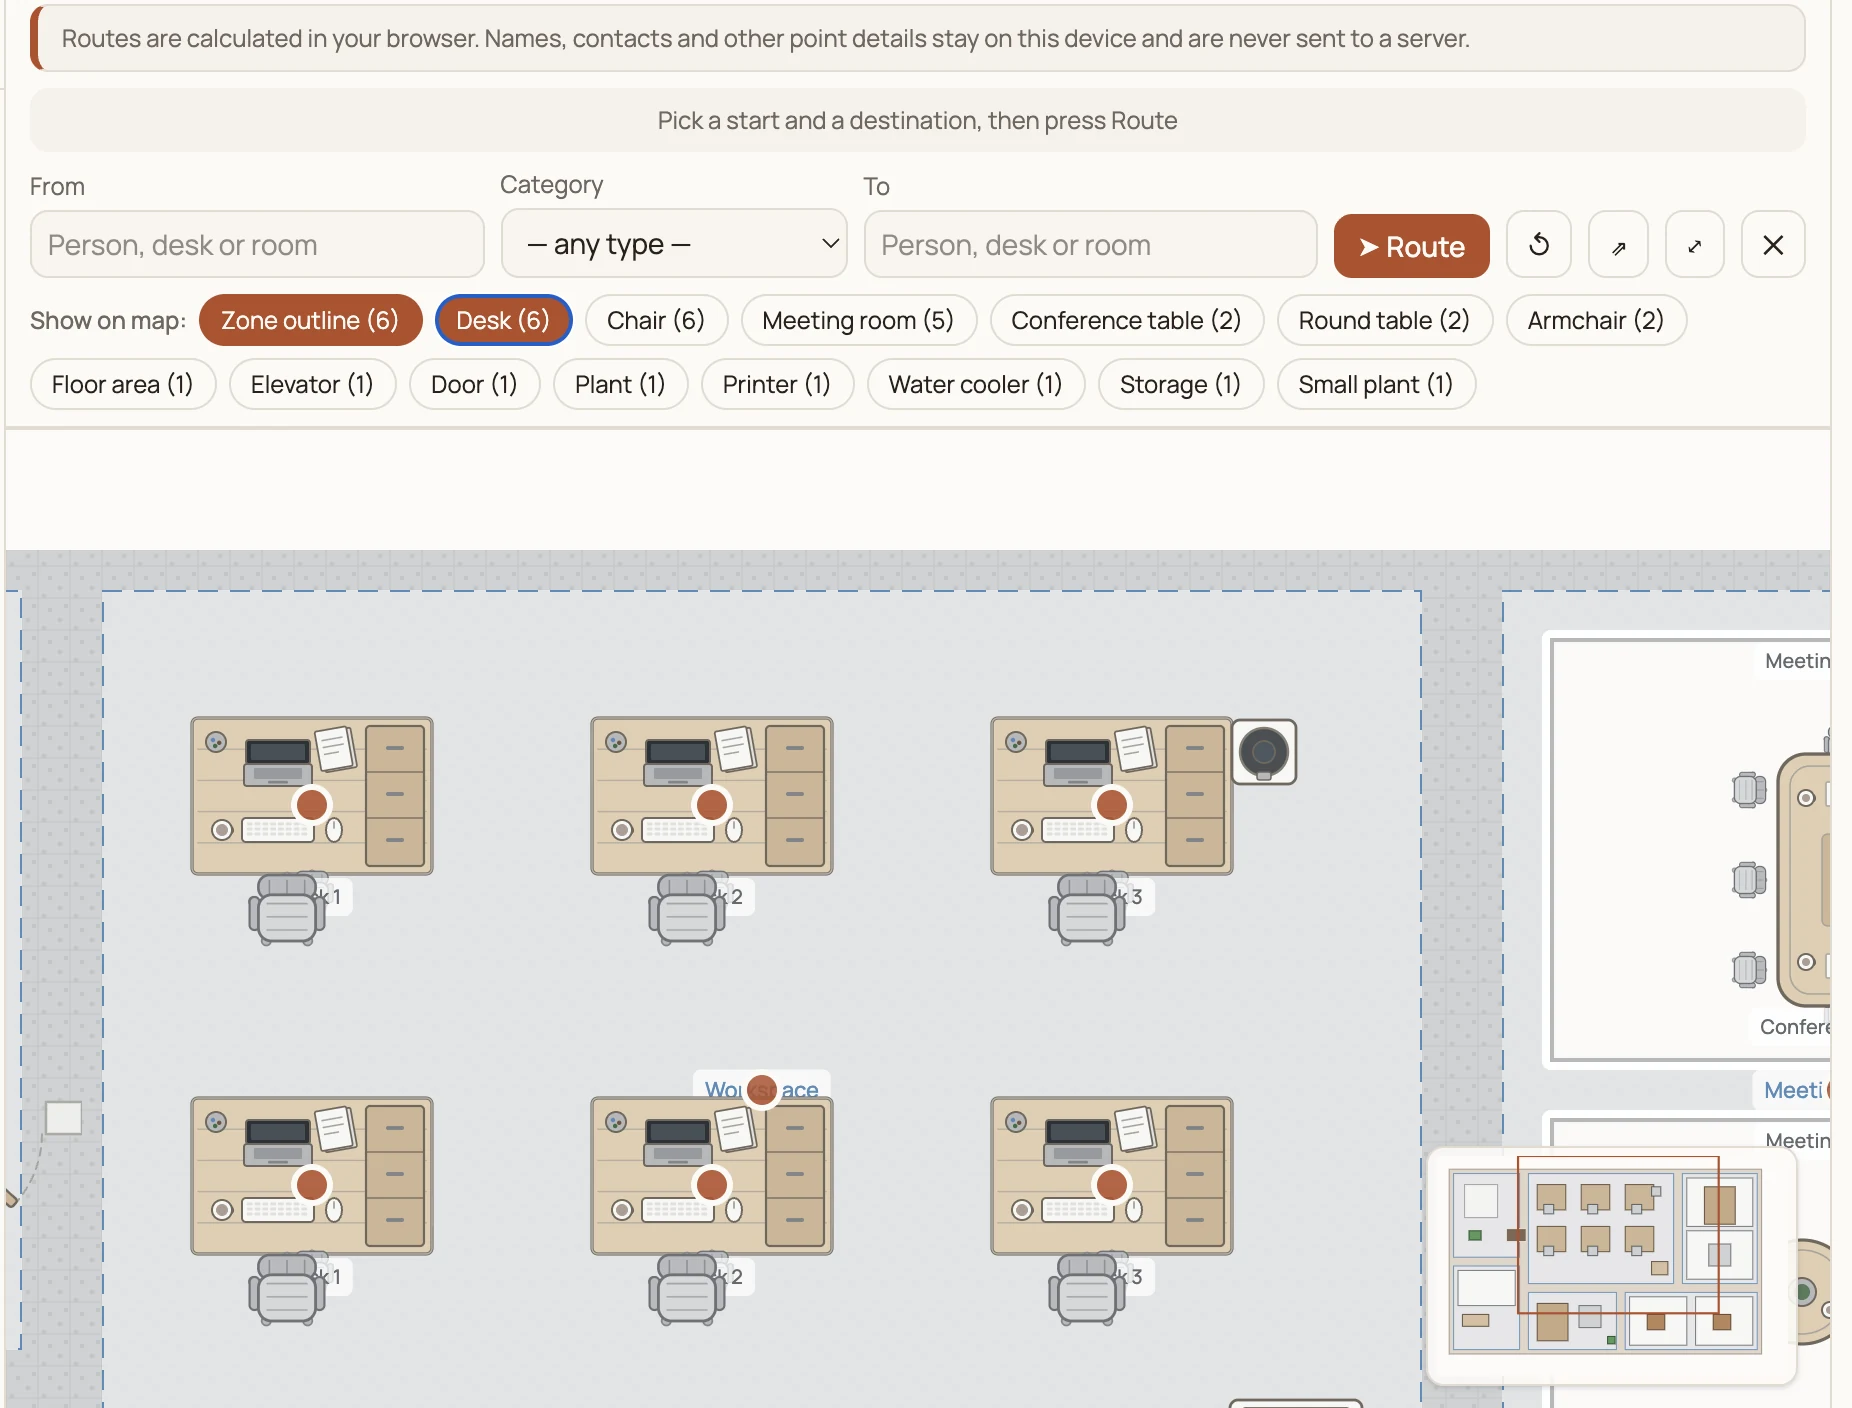
For example:
Reception → Meeting Room A
or:
Entrance → Marketing Department
or:
Desk 14 → Conference Room
The editor can also create a link to a route.
The wayfinding calculation is performed in the browser rather than sending the calculation to a server.
For workplaces with visitors, shared desks or many meeting rooms, this can make the office map much more practical than a conventional printed directory.
Step 9: Export Your Office Map
Once your map is ready, Office Map Editor provides several export options.
You can export the project as PDF, PNG, CSV list, JSON data, print output or an HTML web page.
The HTML option is particularly interesting for digital environments because a self-contained web page containing the plan, legend and searchable list of elements.
Which format you choose depends on what you want employees to do with the screen.
| Goal | Suitable format |
|---|---|
| Show on the screens | HTML |
| Simple static office map | PNG |
| Printable floor directory | |
| Web-based office directory | HTML/web page |
| Data integration | JSON/CSV |
| Interactive navigation | Web-based map |
Step 10: Display the Office Map with BuzzBlender
Now the office map needs to reach the screens.
BuzzBlender is a cloud-based digital signage platform designed to remotely manage content across TVs, monitors and signage displays. Its current workflow consists of connecting a screen, uploading or adding content and publishing it to the display.
BuzzBlender supports images, videos, web pages and HTML content, which makes it suitable for several office-map workflows.
For a simple directory, export your office map as an image and add it to BuzzBlender.
For a web-based map, add the relevant web content instead.
You can then publish the content to the screen or include it within an office playlist.
Step 11: Connect Your Office Screen
BuzzBlender is designed to work across multiple display platforms. The official features page currently lists Windows, Linux, Android, LG screens, Samsung screens, macOS displays, Smart TVs and media players among its supported environments.
That means businesses may be able to use displays they already have instead of building a dedicated office-map infrastructure.
The general BuzzBlender workflow is straightforward:
- Connect the display to BuzzBlender.
- Add your exported office map or web content.
- Create or update the playlist.
- Publish it to the required office screen.
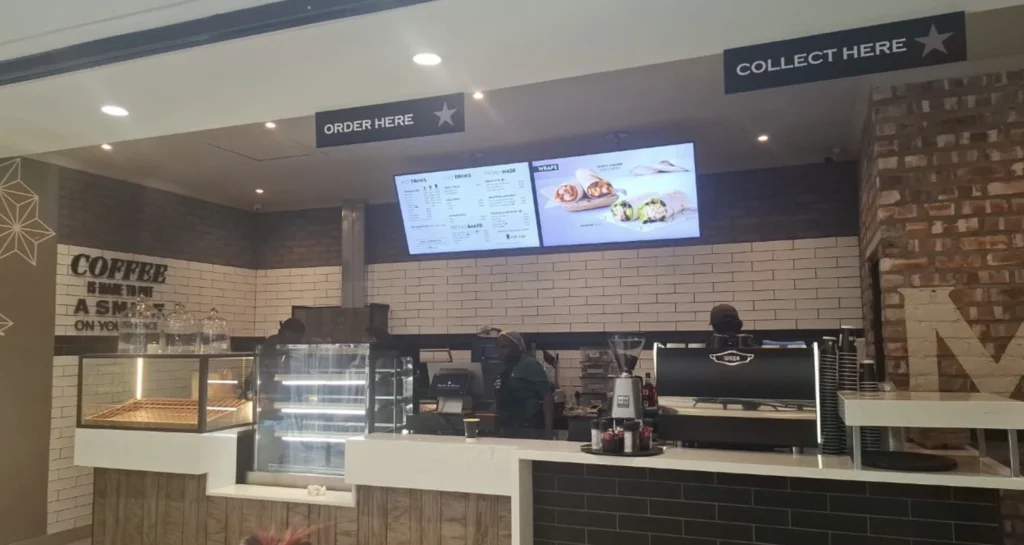
Connected screens can then be managed remotely from the BuzzBlender dashboard.
Step 12: Decide Where the Office Map Should Appear
You don’t necessarily need to display the map continuously.
BuzzBlender supports playlist scheduling by time and day of the week. Content can also be published across multiple screens.
For example, a reception display could alternate between the office directory, company announcements, visitor information and internal communications.
A screen next to an elevator could focus primarily on the relevant floor map.
And a display inside an employee area could combine the office map with company news, dashboards and announcements — all common corporate digital signage use cases identified by BuzzBlender.
Static Office Map vs. Interactive Office Map
There are two main ways to approach an office-map deployment.
A static map is the simplest. Export the plan as PNG and display it like any other digital signage image. This works well when the primary goal is to show room locations, departments and basic directions.
An interactive or web-based office map makes more sense when users need to search for people, desks or destinations or use wayfinding.
The Office Map Editor documentation specifically describes searching for people, desks and departments and calculating routes between locations.
BuzzBlender also provides a kiosk mode as part of its digital signage offering.
The exact deployment should therefore be chosen according to whether the display is intended only for viewing or for user interaction.
Why Combine an Office Map with Digital Signage?
The main advantage is centralized screen management.
A printed floor plan has to be replaced whenever an office layout changes. A digital signage network allows the displayed content to be updated remotely.
BuzzBlender’s cloud dashboard can manage connected screens and update content without visiting every display individually.
This becomes particularly useful when an organization has multiple screens, floors or locations.
You can maintain the office layout in the map editor, export or update the map when something changes, and then distribute the new version through BuzzBlender.
The result is a straightforward workflow:
Create → Update → Publish → Display.
Pros and Cons of a Digital Office Map
| Pros | Considerations |
|---|---|
| Helps visualize rooms and departments | The map needs updating when the layout changes |
| Can associate people with workspaces | Large maps must be designed for screen readability |
| Supports multiple floors | Interactive use requires an appropriate deployment |
| Can provide route guidance | Screen placement matters |
| Can be updated digitally | Source map information must remain accurate |
| Can be distributed across office screens | Static PNG maps don’t provide search or wayfinding |
How Much Does It Cost to Display the Map?
For the digital signage side, BuzzBlender’s current Basic plan is listed at $5 per screen per month. It includes remote management, playlists and scheduling, screen monitoring, image/video/web page/HTML support and kiosk mode. The Premium plan is currently listed at $10 per screen per month, while Enterprise pricing is available on request.
This makes it possible to start with one office directory screen and expand the deployment later if more displays are required.
From Floor Plan to Digital Office Directory
The most important part of an office-map project isn’t simply drawing the floor.
The goal is to transform physical workplace information into something employees and visitors can actually use.
Start with your existing floor plan or a template. Add walls, rooms, departments and workstations. Associate people with relevant locations where appropriate. Configure multiple floors and test the map in 2D and 3D. Add wayfinding if navigation is required. Then export or publish the resulting map and use BuzzBlender to distribute it to workplace screens.
Instead of treating office signage and workplace mapping as two separate systems, this workflow connects them:
Office Map Editor creates the workplace information. BuzzBlender brings it to the screens.
Key Takeaways
An office map can be built from a template or imported PDF/image, enriched with rooms, departments, furniture and people, and displayed in either 2D or isometric form. Office Map Editor also supports searching and point-to-point wayfinding.
For screen distribution, BuzzBlender can publish images and web content to remotely managed office displays, create playlists and schedules, and manage compatible screens from a centralized dashboard.
For the simplest setup, export the office map as PNG and display it through BuzzBlender. For a more advanced implementation involving search or navigation, use a web-based approach appropriate to the intended screen and interaction model.
FAQ
Can I upload an existing office floor plan?
Yes. Office Map Editor allows you to upload an image or PDF page of an existing plan and draw over it. It also includes an option for detecting clear wall lines.
Can I add employees to the office map?
Yes. Desks, chairs and meeting tables support a “Who sits here” property, and the editor can search for people on the plan.
Can the office map show directions?
Yes. The Wayfinding feature calculates a route between two points while navigating around walls and furniture and shows distance and walking time.
Can I create maps for several floors?
Yes. Additional floors can be created and managed separately in Office Map Editor.
Can BuzzBlender display an office map?
Yes. BuzzBlender supports image and web content, so an exported office map can be included in digital signage content and published to connected screens.
Can I manage office screens remotely?
Yes. BuzzBlender provides centralized cloud-based screen and content management.
How much does BuzzBlender cost?
The current official pricing lists the Basic plan at $5 per screen/month and Premium at $10 per screen/month. Enterprise pricing is available on request.
Put Your Office Map on the Big Screen
Create your workplace map, connect your office display and use BuzzBlender to manage what employees and visitors see — from one screen to an entire network.
Take control of your screens today with Buzzblender
What Our Customers Say
⭐⭐⭐⭐⭐
Simple, Reliable, and Surprisingly Affordable Digital Signage
We tried several digital signage solutions before switching to BuzzBlender, and it has easily been the simplest and most reliable option we’ve used.
Setting it up on our Samsung displays was quick and straightforward. Managing content is just as easy—even for team members who aren’t particularly tech-savvy. We can update our screens in real time, launch promotions, change menu content, and manage everything remotely without needing any additional hardware.
What really sets BuzzBlender apart is the combination of simplicity and affordability. It gives us everything we need without the complexity or high costs of other systems—and at just $5, the value is hard to beat.
Aadan


Leave a Reply